Friday, November 6, 2015

Seattle - the Land Devoid of Good Tex-Mex Food

I suppose I could edit that title to say: "The Pacific Northwest - the Land Devoid of Good Tex-Mex Food" and it would still be true.

When I first moved to the Pacific Northwest - around Eugene, Portland, and then the Seattle area - I missed my comfort Tex-Mex food.  I didn't even realize how much it was a comfort food for me until I couldn't find it anymore!  It quickly became clear that I had to find a way to make my favorite foods for myself.

Growing up in south Texas, my family could afford to dine out one night a week.  Every Friday, almost like clockwork, you could find my family at a local Mexican restaurant named El Corral in Kingsville, Texas.  Of course it wasn't called a Tex-Mex restaurant; it was just called a Mexican restaurant!  When you are in Texas, there aren't any restaurants that advertise themselves as Tex-Mex.  Sure, if you strike up a conversation with the owners or other enthusiasts, they'll agree they are serving Tex-Mex food and not authentic Mexican food.  There are restaurants that tout themselves as "Authentic Mexican Restaurants" in Texas, and of course the food is very different than the Mexican food most Texans have grown to know and love.  Black beans and mole sauce, anyone?

I cried out for good Tex-Mex food in Oregon and Washington, and people would point me to a few restaurants.  I would leave utterly disappointed.

First of all, why don't these places have a simple staple appetizer on their menu - queso dip?!  Sure, some of them have queso dip on the menu, but much like certain droids, it is not the queso dip you are looking for.  Queso dip shouldn't be made with a stringy cheese; queso dip should melt beautifully!

American cheese is the way, and I'm not talking about Velveeta or Kraft singles.  Sure, we might have a special nostalgic place in our heart for those Kraft singles and Velveeta melted with a can of Rotel, but you know what?  We can have nice things now.  Velveeta and Kraft singles are perfectly acceptable in a pinch or when finances are tight, but you can indulge yourself now.  You've earned it.  Go to your deli counter and ask for yellow (or white) American cheese.  Boar's head, Land O'Lakes, Kroger brand - whatever you can get your hands on - will all work!  Deli yellow American cheese is made of a blend of cheddar and colby cheese, and white American cheese is a blend of white cheddar and jack cheese.  Both are perfectly acceptable choices when making a queso dip!

During my time in Austin, I found a Mexican restaurant called Matt's el Rancho.  While they did not have my favorite cheese enchiladas in town (that honor belongs to a restaurant called Maudie's - the Josie's enchiladas, without onions on top) they did have some amazing beef fajitas and a queso dip called the Bob Armstrong dip.

That dip was named after a friend of Matt Martinez, a man named Bob Armstrong.  They met each other through wrestling, and Bob is still a frequent visitor of Matt's el Rancho.  In fact, I had the honor of meeting him one day!  I ordered the famous queso dip (it's almost sacrilege not to...), and he walked up to my table and several others and asked: "Is that the Bob Armstrong dip?"  "Yes it is."  "Well, hi!  I'm Bob Armstrong!"  He was a charming, affable man, and you could tell he was immensely proud of that dip and its ability to strike up a great conversation.  Texans have a reputation for being friendly, and Bob Armstrong keeps that reputation going!

I've sent many friends to Matt's el Rancho for beef fajitas, and they have all agreed they are some of the best they've ever had!  One Mexican friend I grew up with is pretty loyal to her family recipes.  I told her: "Just try them out!"  She's hooked now.

The best part about Matt's el Rancho is that a lot of their recipes are available through their cookbooks!  Unfortunately they are out of print, but you can find them through used book stores and the like.  I have all three of Matt's books, but my favorite by far is the first one listed here:


Go.  Buy it now.

If you can't wait for it to arrive or if you can't find the book, here are a couple favorite recipes of his that I have tweaked to my own taste.  Once you get the hang of making beef fajitas and you have the Texas Sprinkle & Black Magic Finishing sauce on hand in your pantry, it will take you a total of 30 minutes or less to make fantastic fajitas for dinner!

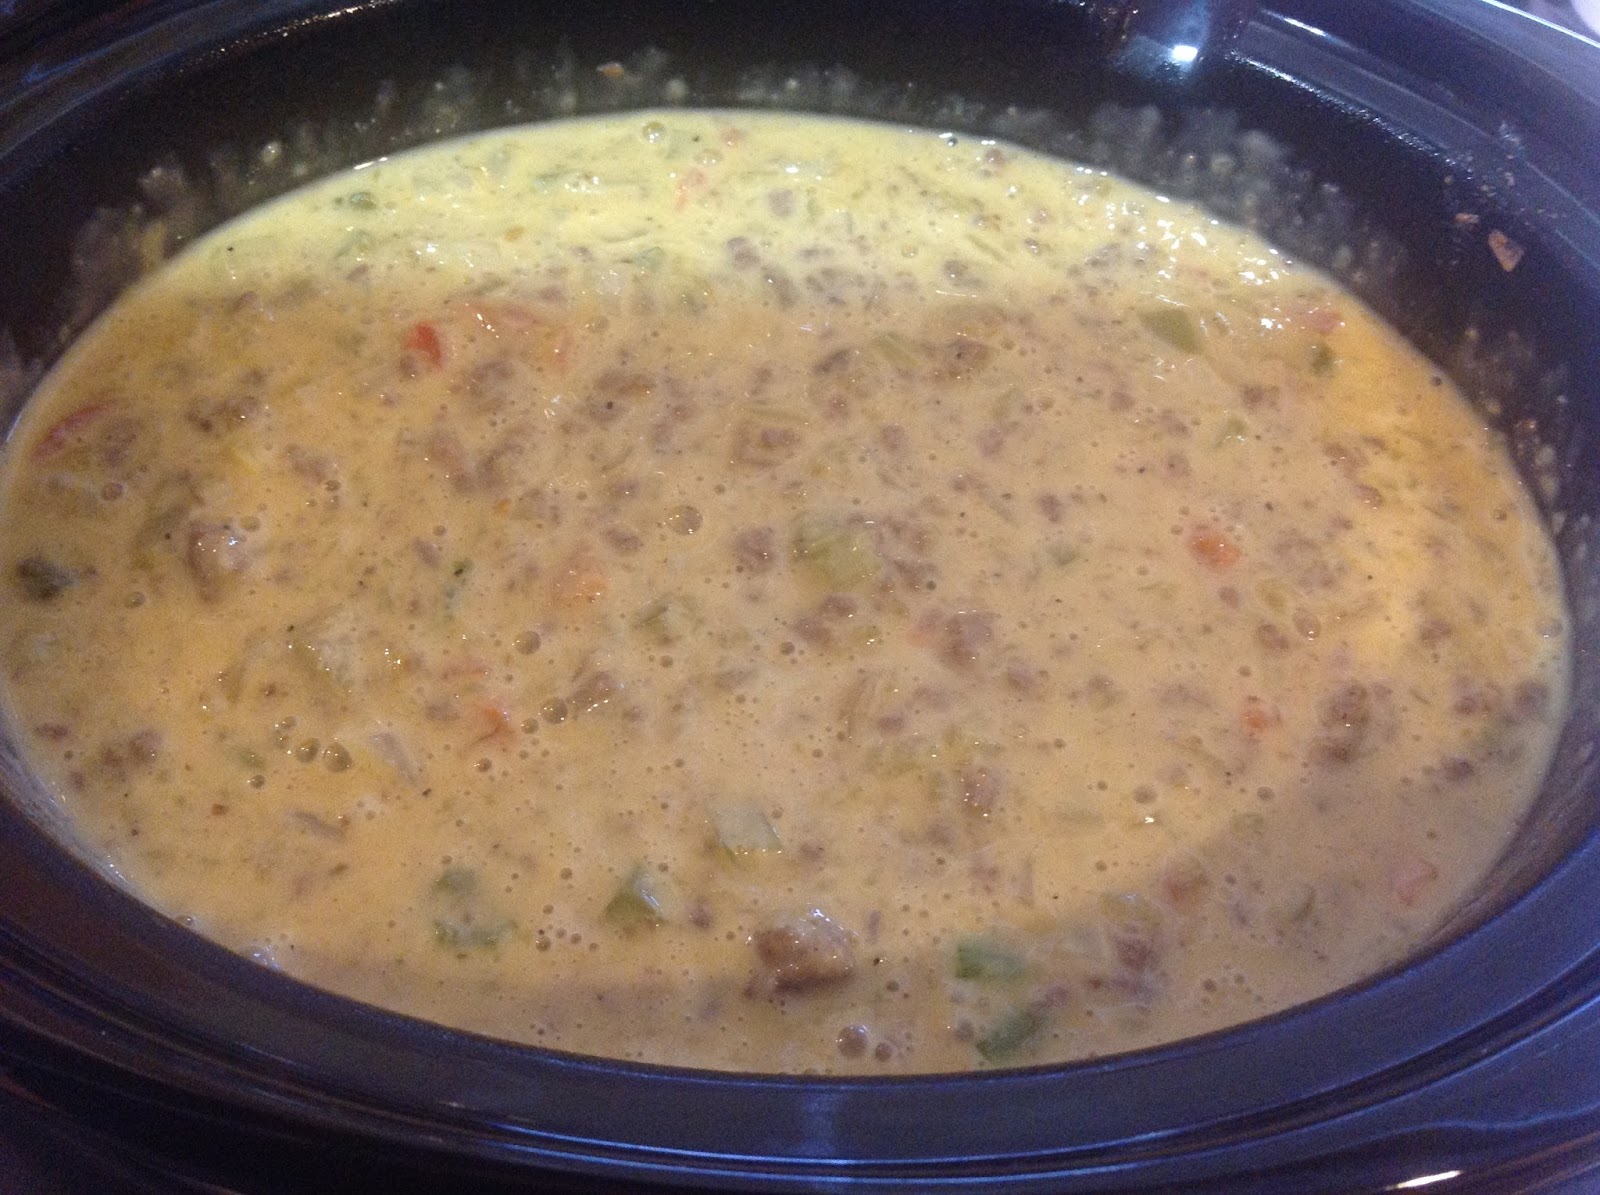
Queso Dip
For Matt Martinez's Tex-Mex Spice:
3 tablespoons plus 2 teaspoons ground cumin
3 tablespoons granulated garlic
2 tablespoons salt
1 tablespoon coarse ground black pepper

For taco meat layer:
1/4 cup finely chopped bell pepper
1/4 cup chopped celery
1/2 cup chopped white onion
2 tablespoons Tex-Mex Spice
1 pound lean ground beef


For chile con queso layer:
1 1/2 cups canned chopped green chiles or fresh chiles, peeled and finely diced
1/2 cup diced fresh tomato
1/2 cup diced onion
1/2 cup diced celery
4 teaspoons Tex-Mex Spice
1 cup chicken broth
2 pounds American cheese or more if needed, cubed, or if sliced, torn into 4 pieces


For guacamole layer:
2 large Haas avocados
1/4 of a package of Concord Foods Guacamole season (regular or spicy, your preference)
2 teaspoon King Cajun cream spice
1 teaspoon dried onions
1/2 teaspoon cayenne pepper
1 teaspoon Tex-Mex spice
2 teaspoon Salt Grass spice
Juice of 1/2 a lime

Additional serving requirements:
Tortilla chips for dipping
A glass baking dish & hot serving tray or Crock pot for serving warm, possibly an additional smaller one for serving a separate version without avocado.
  1. Prepare the Tex-Mex spice by mixing together the above 4 spices.  Store in an airtight container, and be sure to label it for future use in other Tex-Mex cuisine.  
  2. Prepare taco meat layer. In a cold skillet, stir together bell pepper, celery, onion and Tex-Mex spice. Spread the uncooked meat on top.  You can leave it in one solid piece. Place over medium heat. When meat starts to simmer, stir and break up the meat. Simmer on low for 20 minutes or until the meat is cooked throughout. Remove from heat; drain and discard any fat. Cover to keep warm, and set aside. 
  3. Prepare chile con queso layer. In a saucepan, combine chiles, tomato, onion, celery, Tex-Mex spice and chicken broth. Bring to a light simmer; gently cook for about 5 minutes. Reduce heat; add cheese. Simmer and stir periodically until cheese melts. (If mixture is too thick, add water; if it's too thin, add more cheese.) Remove from heat.
  4. Prepare the guacamole layer.  Halve avocados and scoop flesh into a mixing bowl; discard pits and skin. Add lime juice; mash together until mixture reaches a chunky texture. Add the other seasonings and stir to combine.  Cover with plastic wrap, making sure the wrap touches the surface of the guacamole. Set aside. 
  5. In either a large glass baking dish with a hot serving tray underneath, a Crock pot set on low, or other warm serving dish, combine the taco meat layer, chile con queso layer, and the guacamole layer.  Personally, I combine the chile con queso layer and the taco meat layer into one giant crock pot, stir, and then I pull put a smaller serving and put it into a 1 qt crock pot where I then add some of the guacamole to the mix.  Several people (read: non-Texans) in my circle don't like avocados, so I always serve the guacamole queso dip in a smaller dish.  It's easier to make more of that vs. removing avocado!  Plus if someone wants guacamole, they can just eat some guacamole with their chips!  Alternatively, you can warm the queso dip in a glass baking dish in the oven and pop it back in when it needs to be reheated.
  6. Also note that this recipe can be easily doubled.  Just make sure your pans and crock pot can handle a double amount!  This dish is always available at my house for Superbowl parties and the like.

Beef Fajitas (chicken, shrimp & veggie too - but choose wisely & make beef!)

For Texas Sprinkle:
4 tablespoons cracker meal or finely ground, unflavored bread crumbs
3 tablespoons plus 2 teaspoons granulated garlic
3 tablespoons salt
2 tablespoons coarse ground black pepper
  1. Combine & store in an airtight container and label.  Rule of thumb for meat, chicken and seafood: Use 1 teaspoon per 4 ounces.  For veggies: Use 1 teaspoon per 2 cups.
For Black Magic Finishing Sauce:
1 bottle (10 ounces) light soy sauce
1/3 cup red wine vinegar (not balsamic)
1/3 cup red wine (recommended: Cabernet Sauvignon)
  1. Combine & store in an airtight bottle and label it.  This pairs well with fire-grilled and skillet-grilled foods.  Rule of Thumb: Use 1 teaspoon per 4 ounces of veggies, meats, chicken or seafood.  
  2. Black Magic should be added at the end of the cooking process.  When the product is cooked the way you want it, add the sauce, stir, flip, and coat evenly.  Let the sauce meet the heat to do its work.  Black Magic will react to a hot skillet or open flame and make lots of sizzle!  When cooking indoors, it may cause a little smoke, so turn your overhead vent on high.
For Meat Fajitas:
1 pounds beef sirloin or tenderloin (sirloin preferred), cut against the grain, on a bias; or boneless skinless chicken breasts or thighs; or 16-20 count shrimp, peeled and deveined
8 teaspoons Texas Sprinkle (recipe above, portioned according to the weight of your meat)
3 tablespoons cooking oil
2 cups sliced onions
2 cups sliced bell peppers
Black magic Finishing Sauce (recipe above, portioned according to the weight of your meat)
8 to 12 flour or corn tortillas, warmed
Shredded cheddar cheese or a tablespoon or so of queso dip (above)

Other optional garnishes:
Sour cream
Pico de gallo
hot sauce/taco sauce
  1. Set aside your Texas Sprinkle, Black Magic, and other ingredients mise en place so you can quickly combine ingredients.
  2. In a 10- or 12-inch (cast iron, preferred) skillet, heat 3 tablespoons of oil to medium-high.  Turn heat down to medium and cook meat 1 pound at a time:  For beef, cook for 1 minute first, then add onions and peppers to cook 2 to 3 minutes longer, or until redness is gone from the meat.  For chicken and shrimp, put down at the same time as the onions and peppers, and sauté for about 3 to 4 minutes
  3. Once meat is cooked, drizzle Black Magic over skillet and toss to coat evenly for 15 to 20 seconds and listen to that sizzle!  Place on a family style platter or in the warm cast iron skillet and serve immediately with tortillas, hot sauce, garnishes, and sides such as my borracho beans!
For Veggie Fajitas (no meat): 
  1. Use a combination of corn, chopped broccoli, and sliced onions, bell peppers, mushrooms, zucchini and yellow squash.  Allow 1 cup of veggies per serving.
  2. Cook 2 cups of veggies at a time: Use 4 teaspoons of Texas Sprinkle and 3 tablespoons oil.  Saute for 3 to 4 minutes on medium-high.  When veggies are cooked, drizzle with Black Magic and toss for 15 to 20 seconds. 

Tuesday, May 5, 2015

We Have Pork Leg Steaks - What Now?

A few months ago, we went "halfsies" with a friend on a half of a pig.  For the most part, a lot of the pig has been sitting in the freezer without many ideas on what to do with it.  Sure, we know what to do with pork chops, ribs, ground pork, pork belly, etc.  Some of the cuts are a bit unfamiliar to us, so we have to get creative with them!

Fast forward to tonight, and we had a pork leg steak that we needed to use.  Chance pulled it out of the freezer the other day, and I was left with the responsibility of cooking dinner tonight.  He told me it was pork chops (and essentially, it is), so I looked up a recipe for pork chops.

Plus I needed to cook those fiddlehead ferns that were sitting in my fridge before they went bad.  It would be tragic if I let them go to waste!  Of course the real tragedy is their short availability season - late March through mid to late May.  They're my favorite side dish!  Sometimes I will just saute them with bacon, butter, garlic, salt and pepper.  I know, I know - it's cheating.  Of COURSE any vegetable would taste great that way!

I saw the label on this cut of meat and began to doubt myself.  He explained that I should just cook it like a pork chop and we will cut it in half after it is done.  So off I went!

I found a pork recipe that sounded good - mostly because I knew I had all of the ingredients in the kitchen and I wouldn't have to run to the store - and tweaked it.  So here is my entire dinner recipe, folks!


Balsamic Pork Chops/Leg Steaks

3 tbsp all-purpose flour
1 teaspoon of chopped rosemary (dried is fine)
1 pork leg steak
2 tbsp unsalted butter
2 tbsp olive oil
2 garlic cloves, crushed
1 2/3 cup chicken broth
1/3 cup fig balsamic vinegar (or whatever other balsamic vinegar you have in your pantry)
Salt & pepper, to taste


  1. Stir the flour, rosemary, and some salt and pepper together on a large plate to make a nice dredging flour.  
  2. Place the leg steak in the flour, and use a spoon to get some of the flour mixture in all of the little crevices.  Flour both sides of the leg steak.
  3. In a large skillet on medium-high heat, melt the butter together with the olive oil.  Put the crushed garlic cloves in the oil and let it simmer in the oil for about 1 minute.
  4. Place the flour-coated leg steak into the skillet and cook each side for about 4 minutes per side, or until golden.
  5. Remove the leg steak after cooking for 4 minutes on each side and set it on a plate.
  6. Pour the chicken broth and vinegar into the same skillet and use a whisk to scrape up any stuck on bits.  Reduce the mixture until about half of the liquid is gone - about 5 minutes.
  7. After the liquid has reduced, put the leg steak back into the skillet with the balsamic reduction and cook it for about another 6 minutes total.  You can flip the steak about halfway through so the liquid nicely coats both sides of the meat.
  8. Remove the leg steak from the skillet and cut it in half.  One leg steak should be two servings.
  9. Serve with a tablespoon or so of the balsamic sauce on top.


Fiddlehead Ferns and Yellow Squash

1 yellow squash, cut on a bias in 1/3 inch thick slices
1 lb fiddlehead ferns, washed to get the darker leaves off and end pieces trimmed
2 cloves of garlic, minced
2 tbsp butter
2 tbsp olive oil
1/3 cup chicken broth
2 tbsp "Dirt" brand Creole blend seasoning
Salt & pepper, to taste


  1. Put the butter and olive oil in a medium size skillet on medium heat.
  2. Stir the squash and fiddlehead ferns together in a bowl with the Dirt seasoning.
  3. Place the garlic, squash, and fiddlehead ferns in the skillet and stir.  
  4. About 10 minutes into the cooking process, add the chicken broth and stir.  If you prefer, you can add more dirt seasoning, salt and pepper, at this time.
  5. Cook for another 5 minutes, or until ferns are softened yet still a little crisp and the chicken broth has mostly boiled down.  I put the vegetables in the pan at the same time I put the leg steak in, and the vegetables took almost the same amount of time as the leg steak.  I just turned the heat down when the chicken broth had mostly boiled down.


Steamed rice

2 cups steamed rice, cooked per your rice cooker's instructions

Seriously, go buy a Zojirushi rice maker.  It will CHANGE you.  It keeps cooked rice perfect for almost 2 entire days!  Nope, I am not going to list instructions on how to cook rice!  Just pour some of that balsamic sauce on the rice, and serve with the rest of the above dinner items.

Enjoy!

Tuesday, January 27, 2015

Sous Vide Tomatoes Confit and Other Cute Christmas Food

Aah, sous vide.  It is the technology that has been around for several decades now, and you probably only recently heard of it through Kickstarter.

My partner and I attended a special Sous Vide cooking class hosted by Chef Jason Wilson at Crush a little over a year ago.  What a treat!

Sous vide is a beautiful way to infuse flavors together with slow, gentle, and consistent cooking throughout the entire food.  Jason talked about how different foods require different temperatures and cooking times through sous vide and how you have to bring food back to room temp with an ice bath to prevent harboring food pathogen growth (especially when it comes to animal proteins).  It is also much better to use some sort of vacuum sealed bag when using sous vide.  For one, the water is then able to form a better surface area to the food which allows for a more consistent cooking.  The pressure also helps the flavors infuse a lot better.

One of my favorite parts of the evening was when Jason demonstrated a compressed watermelon recipe.  First, he sealed the watermelon and other ingredients in a Food Saver bag and vacuumed it.  Then he showed us a pressure chamber sealed bag with the same ingredients.  What a difference it made!  The chamber sealer was able to form a much stronger vacuum than the Food Saver, so the watermelon was much darker (crushed slightly better, though not very different in size) in the chamber sealed bag vs. the Food Saver bag.  We already had a Food Saver machine at home, but about six months later, my partner dropped the hammer and bought a chamber sealer.  We love it!  That chamber sealer is great at sealing liquids.  The Food Saver tried to suck air out of the bag, whereas the chamber sealer created a negative pressure chamber to pressurize the bag.  Minimal air is left in the chamber sealed bags, and the Food Saver machines suck so much air - and liquid! - out of the bags, it can even cause itself to shut off due to overflowing the liquid catch tray.  It was very annoying.

We tried to thaw some frozen fish that had been sealed in Food Saver bags, and there was freezer burn on them.  This is almost never the case with our chamber sealed bags (within reason, of course).  It definitely has saved us quite a bit of money in the long run!


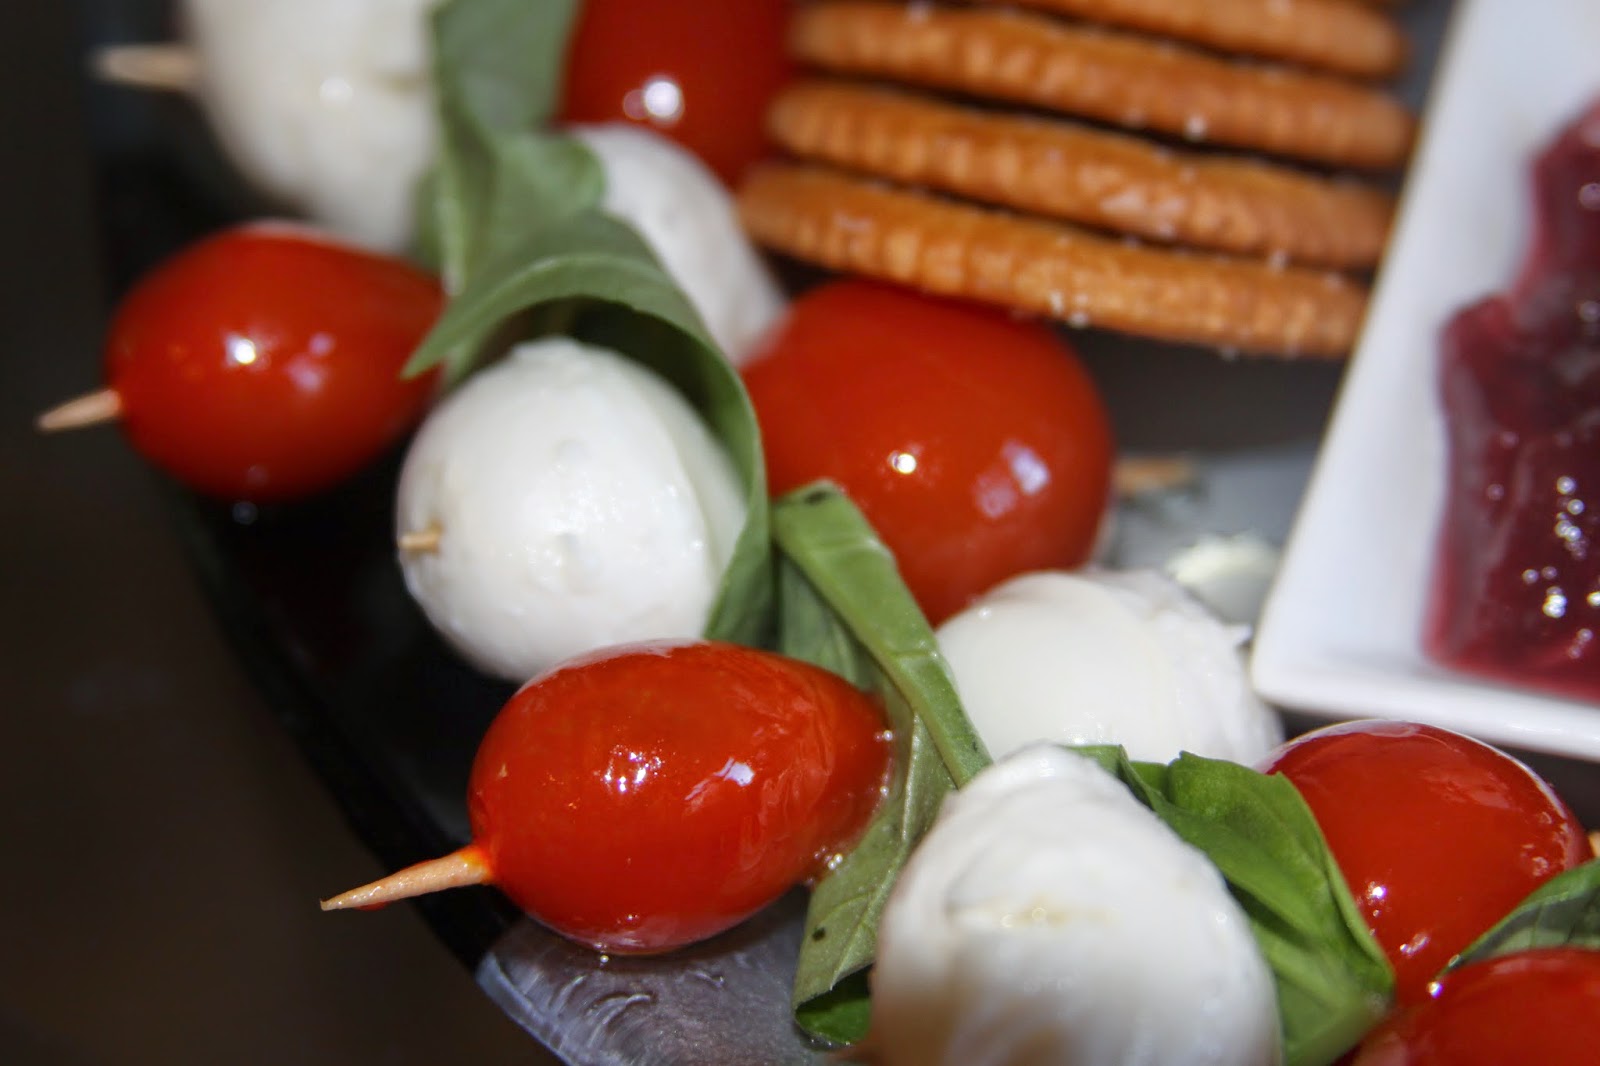
Since I know so many of you have purchased an Anova sous vide cooker through Kickstarter, I decided it would be a good time to share one of my favorite sous vide recipes.  One of my go-to recipes that I took away from Jason's class was a Sous Vide Tomato Confit.  It is so cheap, easy, and quick!  Our guests love it!  I serve it year round.  It's crazy to take a bite of a perfectly sealed cherry or grape tomato and you get a burst of basil, garlic, and chili flake flavor inside the tomato!  I sometimes serve it with some cherry size mozzarella balls.  It makes a beautiful "wreath" display when you put them on a stick - cherry tomato, basil leaf, and mozzarella ball.

With Jason's permission, I am posting this recipe for everyone out there.

Chef Jason Wilson's Tomato Confit

Oven bath temperature: 135F

1 pint cherry or baby heirloom tomatoes (or similar sized tomatoes)
10 leaves of fresh basil
1/2 cup extra virgin olive oil
1 bay leaf
1 tsp red chili flakes
5 cloves peeled garlic
Optional ingredient: 1 package of cherry size mozzarella balls

Procedure:

  1. In a small pan, simmer the garlic in olive oil for 2-3 minutes and remove just before they brown.
  2. Add all the ingredients to a vacuum bag and remove all air by pressing against a sink ledge or counter and expel the air.  
  3. "SEAL ONLY" the bag and place into the 135G water bath for 1 hour.
  4. Serve or preserve when timer sounds.


Optional steps:

  • Add some strained cherry size mozzarella balls and gently stir to coat the mozzarella with the confit juices.  
  • Drain the excess olive oil and refrigerate to serve cold or serve immediately.
  • For a cute "wreath" presentation, put a single cherry on a toothpick, then a small basil leaf, and then a cherry size mozzarella ball, and alternate the placement of the toothpick (cherry side next to the cheese side on the next stick, as pictured to the right).  Since some of the sous vide tomatoes will burst during the cooking process, be sure to double the amount of cherries for this recipe and try to use the soft but still-sealed cherry tomatoes on the toothpicks.  Sometimes they would ooze a little bit once they were pierced, and that was fine.  Just be gentle and pierce the tomatoes slowly; don't jab them or else you will send tomato juice flying across the table. For the rest of the tomatoes that didn't make the skewer cut, just eat them! 


I decided to get extra cute with it during the Christmas holiday time.  I made a cream cheese snowman as the centerpiece to an appetizer tray, and adorned the side with a wreath of sous vide tomatoes and mozzarella!  That was one delicious tray!

I wasn't fully prepared to make a snowman that day.  It was sort of a last minute thought.  I stood there in my kitchen asking myself "I do want to build a snowman, but what should I use to make the snowman's face?"  I wandered over to my spice rack and found some inspiration.  


Cream Cheese Snowman

2 8-oz packages of cream cheese
3 capers
1 apple (any reddish skinned apple will do)
7 pink peppercorns
1 japones chili pepper
2 black peppercorns
2 sleeves of Ritz crackers
2 sprigs of fresh dill
Robert Rothschild's sauce of your choice (pomegranate, raspberry, cherry, or mango flavors will suffice)

  1. Wash your hands thoroughly, but do not dry them.
  2. Take both packages of cream cheese out of the wrapper.
  3. With your hands wet, take one of the packages of cream cheese and try to form a ball shape as best as you can.  You can put it on the center of your serving tray and turn it like it is a pottery wheel, using your hand to shape it.
  4. For the second package of cream cheese, separate a wad of cream cheese that is about the size of a golf ball.  This will be for the snowman's head.
  5. Take the remaining cream cheese and form a second ball, slightly smaller than the base of your snowman.  This will be for his/her belly.  Make sure you keep your hands wet while trying to form the ball.
  6. Place the snowman's belly on top of the base and make sure they stick together nicely.  If necessary, you can sprinkle a little bit of water on it with your fingers and mold them together.
  7. Form the snowman's head with the remaining golf ball size cream cheese and place it on top of the snowman.  Make sure they stick together nicely.
  8. For the snowman's buttons, push 3 capers firmly in the snowman's belly.
  9. For the snowman's smile, push 7 pink peppercorns firmly in the snowman's face, but be careful not to push in too far.
  10. For the snowman's eyes, push 2 black peppercorns firmly in the snowman's face, again, be careful not to push in too far.
  11. For the snowman's nose, cut off the tip of a japones pepper and push it firmly into his face, again, be careful not to push it in too far.
  12. For the snowman's arms, push 1 sprig of fresh dill into each side of the upper part of the showman's belly.
  13. For the snowman's scarf, use a vegetable peeler to peel a long, continuous skin along the apple - about 1 & 1/2 to 2 times around the apple.  Wrap the skin around the snowman's neck.
  14. Place two sleeves of Ritz crackers around the circumference of the snowman base.
  15. Put a small ramekin of dipping sauce at the base of the snowman.
  16. Provide a small cheese knife or spreader to allow guests to scoop away at the snowman.
  17. Enjoy!

Monday, October 20, 2014

Chicken Sausage & Tortellini

This is a typical conversation that happens somewhere between 3-7 pm, almost every single day:

"So what's for dinner?"
"I don't know."
"What's in the fridge?" (usually in reference to what type of animal proteins are thawed and ready to be cooked)
"Umm, there's some ___"
"What are we going to make with that?"
"I hadn't really planned on anything."
"Hmm, what can I make with ___ without going to the store?"

Sometimes the "without going to the store" factor works out in our favor, and other times it does not.

Today, the protein du jour happened to be some of Aidell's chicken mango sausage.  When I heard that was the thawed meat, it called to mind an old recipe I had picked up from one of the cooking demonstration stations at good ole H-E-B in Texas!  Sure enough, I still had it in my recipe box.  I pulled it out and decided I was going to sort of follow this recipe as a "skeleton" recipe and make it my own.

So, here we have it, folks!

Larena's Chicken Sausage & Tortellini


Prep time - approximately 20 minutes, makes approximately 5 servings

Ingredients:
  • ~20 oz rainbow tortellini - cheese
  • 1 package of Aidells chicken mango sausage, sliced in ~3/4-inch thick slices, or whichever chicken sausage you prefer
  • 2 teaspoons caramelized garlic slices with the oil, or use 3 cloves of fresh sliced garlic
  • 1 Serrano pepper, diced
  • 1/2 cup olive oil, divided - 2 tbsp for cooking sausage
  • 1 cup grape or cherry tomatoes, sliced in half
  • 8 large basil leaves, sliced into 1/2 inch wide strips
  • 1/2 cup Parmesan cheese
  • 2 tsp King Cajun - Cajun cream sauce spice
  • Red chili flakes and/or cayenne pepper to taste

  1. Cook the tortellini according to the package instructions. Since you will be finishing the tortellini in a large skillet, be sure to only use the lowest cooking time listed on the package. Be sure to stir occasionally and not hard boil it too long to prevent the tortellini from bursting open.
  2. As soon as you toss the tortellini into the boiling water, put the 2 tbsp olive oil in a large skillet over medium-high heat. (stir the tortellini!) Saute the sausage, garlic, and Serrano pepper until the sausage is lightly brown. Use some tongs to flip the sausage so both sides of the slices get a nicely browned edge. (stir the tortellini!) Cook for 4-5 minutes.
  3. Once the tortellini has finished boiling, strain it and add the tortellini to the skillet, add the remaining olive oil, and stir to distribute evenly. Add the Cajun cream spice, basil leaves, and cherry tomatoes. Stir again to distribute evenly, and then top with the freshly grated Parmesan cheese.
  4. Garnish with a few red chili flakes and/or cayenne pepper according to your spice preference.
Optional ingredients: fresh sliced mushrooms and/or ~1/2 lb uncooked & unshelled/deveined shrimp added at the same time you cook the sausage, garlic and Serrano pepper.

For the nutritional values of this recipe, you can log it through the My Fitness Pal application.  Just search for "Larena's Chicken & Sausage Tortellini."  Disclaimer: this nutritional value calculation is just an estimation.
http://www.myfitnesspal.com/recipe/view/137730541440173

Sunday, February 23, 2014

Larena's Borracho Beans

When my father asked my mom's dad if he could marry her, my grandfather had a few questions for my dad.  You see, my grandfather knew that my dad wasn't going to pursue riches or any sort of fancy lifestyle, and he knew that wasn't something my mom was looking for either in life.  He knew my mom wasn't a gourmet chef (after all, she was only 16 at the time!), but she also knew how to make cheap, simple meals in order to make ends meet.  Most of all, my grandfather wanted to make sure my dad would take happy, willing and able to care of my mom for the rest of her life.

He asked my dad "Will you be okay with just eating beans and cornbread every day?"
My dad responded with "Absolutely!  I LOVE beans and cornbread!"

Yeah, I don't think he quite understood my grandpa's point...  haha!  Grandpa was aware my mom knew how to make beans and cornbread, and he knew my parents' budget was going to be pretty tight and meals weren't going to be very extravagant.  My dad didn't really care.  He was raised by a single mom in Texas for many years, so beans and cornbread were A-Okay by him!  Living on a meager budget was not going to be a big problem for him, and it wasn't going to be a problem for my mother either.

My dad was born and raised in Texas.  My mother was born and raised in Texas.  My brother and I were also born and raised in Texas.  Where we grew up, beans and cornbread were a staple food!  You could go to H-E-B and buy bulk pinto beans for drastically cheap prices, and guess what?  You just bought an excellent source of a cheap protein that could feed your family for days.  Beans are incredibly cheap, and they can be delicious!  Nowadays, my dad can make a pretty fantastic pot of beans.  It's one of his specialty dishes!

I was never a very big fan of refried beans, but if you put some borracho beans in front of me - oh, it was ON!  I grew up on beans and cornbread, especially during the winter months.  Since my father was in the construction business, the winter season was usually less prosperous because people were saving up money for the holidays and then recovering from the holiday spending.  People weren't able to spend the money on getting the house fixed after taking a big financial hit at Christmas!  Throughout the year, my mom would buy staple foods that wouldn't spoil so that we could be sure to have plenty to eat during the months when income was a lot lower.  

These old, ingrained habits are largely why my pantry is so full all of the time!  At any given point, you can almost always find things like beans in my pantry!  But please, don't show up at my house if a zombie apocalypse happens :P  (In other words, I am not worried about anyone showing up at my doorstep looking to ransack my pantry!)  When I set out to make these Texas style borracho beans (translation: "drunk beans") the other day, all I had to buy was an onion, cilantro, canned tomatoes, a lime, and a garlic clove (I had one, but I wanted a fresher one).  I spent about $5 at the grocery store to make this meal, and it made a very large family serving!  I had the rest of the stuff sitting in the pantry (or fridge - bacon, bell pepper and jalapenos).  I always use the dried chicken granules to make my own chicken stock, and I always use whatever bottle of beer is leftover from previously hosted gatherings.  It is a delicious and cheap way to feed large parties of people!

Also, please note you can use a crock pot to make these beans, though I recommend using an enameled Dutch oven.  I do recommend doing steps 1-2 in some sort of enameled Dutch oven or other large pan on the stove (for at least 30 minutes) before you put it in a crock pot.  It will save you a lot of time, and you really should soak the beans for at least 4 hours.  If you have a large amount of time, you can put all of the ingredients together in a large capacity crock pot and just leave it overnight or in the morning before you go to work.


As I discussed in a previous post, if you are concerned about the alcohol in the beans, please look at this link.  Since you will be simmering the beans for over 2.5 hours, there will be less than 5% of that one bottle of beer left in your beans.  5% of the 5% of alcohol by volume in an average beer leaves you with about half of the alcohol in an Alcoholics Anonymous-approved "Near Beer"!  When you divide that out into how many servings this dish makes, the amount of alcohol is almost negligible.

Larena's Borracho Beans

1 lb dried pinto beans, washed (and “sorted” to ensure there are no rocks mixed in)
Water (no salt) to soak the beans
2 quarts chicken stock
1 ½ tbsp of Salt Grass Spice (if you don’t have it, use salt/pepper to your taste, and add about ¼ tsp paprika)
2 cans Mexican style stewed tomatoes, cut into ½” pieces
1 white onion, diced
6 cloves garlic, minced
3-4 bay leaves
¼ cup pickled jalapeno slices, cut into half-slices
1 ½ cup (approximately) of chopped fresh cilantro, including stems
1 – 12 oz bottle/can of a dark beer (or a Mexican beer such as Dos Equis, Corona, Negro Modelo, etc)
3 slices of bacon, cut into ½” wide slices (or salt pork, bits of ham from ham hocks or sliced deli meat, etc)
½ of a bell pepper, diced  into ½” pieces
1 tsp mesquite flavored liquid smoke
1 ½ tbsp dried oregano
2 tsp dried basil
1 tsp cumin powder
¼ tsp cayenne
½ tsp garlic powder
2-3 tbsp of tomato paste (to taste)
a small squeeze of lime juice
Additional salt/pepper to taste


  1. Soak the beans (covered) overnight, or for at least 4 hours.
  2. Drain the beans, and refill the pot with enough chicken stock to cover the beans with approximately 2 inches of chicken stock (you may need to make additional stock, depending on the size of your pan).  Season with the Salt Grass spice (or salt/pepper/paprika if you don’t have any of the 7-spice).  Cover and bring the beans to a boil.  Once it has started to boil, reduce the heat to medium low, re-cover, and cook for 1.5 hours.  Stir your beans occasionally to prevent the beans from sticking to the bottom of the pot.
  3. Once the beans have finished their main cooking process, add in all of the remaining ingredients and stir well to combine and distribute the ingredients.
  4. Continue to cook the beans, uncovered, for 1 hour, or until the beans are nice and tender.
  5. Taste the beans and add some additional salt or pepper if necessary (I add approximately 1 more tsp of pepper if I am using the Salt Grass steak spice).
  6. Optional step: you can crush the beans just a little bit with a potato masher or a meat tenderizer to thicken the liquid.  I prefer to just cook out some of the additional liquid instead!  The beans will be quite forgiving if you keep stirring and cooking them, uncovered, at a low setting.  Just keep an eye on them and don't let them sit for more than another hour or so.

For a nutritional value breakdown of this recipe, you can find it on My Fitness Pal by doing a search for "Larena's Borracho Beans."   Disclaimer: this nutritional value calculation is just an estimation.
http://www.myfitnesspal.com/recipe/view/41575906

Monday, February 10, 2014

Beef Minestrone Soup

Soup.  Buttered saltines.  My little panda bear Chinese soup spoon.  My Care Bears TV tray.

During my childhood, these were the things that made my lunch on sick days.  Sometimes it was just lunch on a cold day.  Sometimes it was just lunch when mom wasn't feeling up for making a whole big deal out of lunch.

I don't know how she did it.  She managed to butter (okay, it was probably more like Imperial margarine spread) those saltine crackers and splay them out so that only one side of the cracker would be sticky but not too sticky to have all of the crackers stick together.  That sort of mom-prepared-meal-perfection is still endearing when I think back about it.

Progresso Beef Minestrone soup was my favorite "go to" canned soup when I was a kid.  It had all of the beans most kids wrinkle their nose at - lima beans, kidney beans, garbanzo beanscannellini beans, and peas.  I loved them all!

Then Progresso switched to only doing the minestrone soup without beef.  I was so sad!  But, I put on my big girl panties and learned to love the soup without beef.  Then at least a decade ago, they completely changed the recipe altogether.  They switched up the broth and the pasta.  They switched from a long ditalini pasta shape to a short penne shape.  *In my best sad little girl voice* It was not the same.

I've had lots of this new recipe of minestrone soup over the years, and I would long for the old recipe every time I had it.  Then one day I decided I should make some homemade minestrone soup for myself!  This is what I came up with.  Enjoy!

Special note: it can be made in a crock pot, though it will take a bit longer.  Just make sure you brown the beef and onions in a small covered skillet first.  You can experiment with it, but I recommend cooking the ditalini pasta for the last 20 minutes, if not longer, in the crock pot.  It can also stay on low simmer for much longer than an hour.  The longer it stays on simmer, the more the flavors will bloom.  I highly recommend an enameled Le Creuset Dutch oven to make this recipe.  Le Creuset pots are great in that they only need to run on very low amounts of heat to get the job done consistently.  They are *not* cheap, but one will last you a lifetime, and I have never had problems with cleanup.  It's pretty difficult to burn things in an Le Creuset pot if you maintain a low temperature.


Larena's Beef Minestrone Soup
Ingredients
·        1 lb of stew meat (beef)
·        Salt (to taste)
·        Pepper (to taste)
·        2 tbsp. of olive oil or coconut oil
·        1 small onion, diced
·        ~6 cups of vegetable broth (or chicken broth), or ~2 14.5 oz cans to start, 1 extra can after pasta is added
·        3 tbsp. of tomato paste
·        1 ½ tsp. Herbs de Provence
·        ½ tsp. basil
·        ½ tsp. oregano
·        2 bay leaves
·        1 cup of green beans, ends snapped off and pod snapped in half (fresh, not canned)
·        2 cups of cannellini beans (soaked overnight, or frozen or canned - drained)
·        1 cup of garbanzo beans (soaked overnight, or frozen or canned - drained)
·        1 cup of red kidney beans (soaked overnight, or frozen or canned - drained)
·        1 cup of lima beans (soaked overnight, or frozen or canned - drained)
·        2 cups of diced fresh Roma (Italian plum) tomatoes, or canned
·        2 medium sized carrots, peeled and sliced, large discs cut in half (yields ~1 cup)
·        2 large stalks celery, diced
·        1 small russet potato, peeled and cut into ½ inch cubes (approximately 1 cup)
·        a pinch of dried red pepper flakes
·        1 tbsp. of lemon juice
·        2 cloves of garlic, chopped or crushed
·        ½ - ¾ cup dried ditalini pasta or other small pasta (macaroni, shells, etc)
        Optional ingredients: 
·        2 tsp. of Salt Grass spice (no need to add additional salt/pepper aside from seasoning the beef if doing this step)
·        ½ tsp. cayenne

Method
1.    Pat the stew meat dry with paper towels, and season the beef with salt and pepper according to your personal taste.
2.    Using an (enameled, preferably) cast iron Dutch oven, put the stew meat and onions on low-medium heat. Cover and brown the stew meat in the oil and onions, stirring occasionally.  This will take approximately 45 minutes to an hour on low-medium heat.  The onions should be “sweated” and soft and translucent, and the beef should be nice and brown all around the outside.
3.    Combine all the remaining ingredients in a large stock pot or saucepan (except for the pasta), mix well, and simmer for about 2 hours. 
4.    Add the ditalini pasta, stir and simmer for another 20 minutes.  If the soup doesn’t have enough broth for your taste, add additional soup stock or water if you are out of soup stock. 
5.    Remove the bay leaves, and enjoy! This soup can be kept warm if covered and the heat is reduced to an extremely low level.  It can also be frozen or refrigerated for a second round.


For the nutritional values of this recipe, you can log it through the My Fitness Pal application.  Just search for "Larena's Beef Minestrone Soup."  Disclaimer: this nutritional value calculation is just an estimation.
http://www.myfitnesspal.com/recipe/view/41572843

Tuesday, January 28, 2014

Gigante Beans by Any Means

When I try new foods, I'm often surprised at how fantastic they are.  Gigante beans are definitely one of those foods!  The first time I tried them, they were cooked Greek style.  I was thoroughly impressed!

A few months ago, one of my friends asked me if I was familiar with them and if I knew where to find some in bulk.  I was familiar with them, but I had no idea where to find them.  After at quick Google search, I figured out I could find them here in Seattle at Big John's PFI near the International District.  If you are a foodie in the Seattle area, you simply must go visit this store!

Low and behold, there they were - $4.99/lb for gigante beans.  Score!  The cheapest I could find them online was for $5.99 per pound plus shipping fees through Amazon .  Alternatively, I just purchased several pounds of them from Big John's and went home.  Now what?
After doing some searching for similar recipes to the one I had previously eaten, I pieced this recipe together.  I have to say it was superb!  It is definitely being added to our "cycle" of foods we make every so often.  Though it does take a bit of time, it can be broken up easily by soaking overnight, cooking them in the pressure cooker the next evening, and baking them the next day.  Or it can all be done one weekend afternoon.

This recipe can be easily doubled.  It yielded about 6 servings.  Alternatively, you could probably easily double all of the other ingredients in the recipe (except for gigante beans) and it would still be quite tasty.

1 lb dried gigante beans (soaked overnight, or at least 4 hours)
Water to soak the beans
Water to cook the beans in a pressure cooker
½ large onion, chopped (about 1 1/2 cups)
½ orange bell pepper, chopped into 1/2 inch pieces
½ red bell pepper, chopped into 1/2 inch pieces
1 – 14 ounce can diced tomatoes, preferably Italian seasoning
3 garlic cloves, minced
1 large carrot, sliced  into 1/2 inch discs, big disc pieces cut in half or quarters
1 stalk celery & leaves, chopped into 1/2 inch pieces
1 chicken bouillon cube, crumbled
1 tablespoon ketchup
1/3 cup coconut oil (or olive oil)
1/3 lb bacon, chopped (or 6 oz. bacon and 6 oz good quality pork sausage, cut up) (optional)
Ground pepper, to taste
Hot water to cook the beans in the baking dish
1 tablespoon fresh dill, minced
¼ cup (approx.) of crumbled Feta cheese


Directions:

  1. Cook the pre-soaked beans in a pressure cooker, with enough water to cover by one inch, for 20 minutes.  Depending on the style of pressure cooker you have, only count the 20 minutes once the pressure cooker has begun to whistle at regular intervals (for mine, this is about 3x a minute using a 5 lb weight).  Once the 20 minutes are up, turn the heat off the beans and leave them in the pressure cooker, undisturbed, for 2-3 hours before proceeding with recipe.  (Note: if you do not have a pressure cooker, cook the beans with 3 cups of water for every 1 cup of beans in a heavy saucepan with a lid.  Bring to a boil, reduce to a simmer and then cook them for 45 minutes to an 1 hr 30 minutes, depending on how fresh your beans are.  You might have to add cooking liquid if cooking for a long period of time.  I would suggest letting them sit in the water, covered, for at least 1 more hour after they are done cooking.)
  2. Preheat the oven to 400 degrees farenheit.
  3. Strain the beans and pour them into a large glass baking pan.  Note: it is okay if the beans are still a little firm at this point, but they should be plumped up quite nicely.
  4. Combine all of the remaining ingredients, except the dill, and mix well.
  5. Pour in enough hot water to cover beans by 1" in the baking dish.  Note: If the baking dish is not deep enough to cover the beans, pour enough water until it reaches 1“ from the top.  You only want to cover the beans 1” above where they originally came to in the pan before you added the other ingredients.
  6. Place the baking dish in oven and bake for 1 hour 45 minutes.  If you prefer to have your beans more tender, check the beans for the consistency after the 1 hour 45 minutes time is up.  If you want them to have a more tender texture, cook them for an additional 30 minutes.
  7. Stir the dill in, and bake for an additional 15 minutes.
  8. Remove the baking dish from the oven, and serve in bowls. 
  9. Top with a few crumbles of Feta cheese in each bowl, and enjoy!


For the nutritional values of this recipe, you can log it through the My Fitness Pal application.  Just search for "Larena's Gigante Beans."  Disclaimer: this nutritional value calculation is just an estimation, and it is based off 6 servings.  
http://www.myfitnesspal.com/recipe/view/44023960

Tuesday, December 3, 2013

Zipper, My Precious Baby Dog

Zipper
April 18, 1997 - November 29, 2013


I know, I know.  This is a food blog.  You don't come here to read about dogs.  The thing is, this post isn't about just any old dog.  This is about a foodie dog and one of the best dogs who has ever graced this planet with his presence - and my oh my, did he have a presence!

Rest in peace, baby dog.  Those 16 & 1/2 years between those 2 dates were a great "dash" of a life.  Thanks for living up to your name and making that dash between your date of birth and the day you had to go so "zippy" and wonderful.  You didn't just dash through it - you always “Zipped” right through!  16 & 1/2 years is an incredibly great, long run, especially for a miniature Yorkshire Terrier.  You were simply the best there ever was, and that doesn't even begin to capture who you were to everyone.  You made every day around you a pleasure for everyone you ever met, and I am incredibly grateful for your existence in my world for just over half my lifetime.  We have all been incredibly lucky to have you in our lives, and I'm very thankful my parents took such good care of you.  The fact that you were super sweet in giving kisses from the moment I met you until your last waking moment speaks volumes about who you were.

You were a fighter through and through, my little mighty dog, and so much more. 

A best little buddy. 
An always-available petting recipient. 
A consistently cheerful, playful, and loyal companion. 
A believer in living life to the fullest.
A fierce and fearless six-pound home defender. 
An always-ready, champion fetcher. 
A unabashed smiler, miraculously managed even without lips. 
An intuitive therapist. 
A bedside nurse. 
A masterfully active and animated dreamer.
An overflowing container of so much personality.
A genetic hybrid comprised of an unexplained concoction between pure cane sugar and dog DNA that managed to melt even the coldest of hearts. 
A seemingly endless, though diminishing with age, ball of energy.
A bath disloyalist. 
A post-bath shampoo-smell remover. 
A chewer of hair dryer air. 
An electric hair trimmer antagonist. 
A shameless ham for attention. 
A converter of dog-haters. 
A converter of the dog-fearing. 
A converter of an "I don't want an indoor dog" father. 
An ever-ready travel companion. 
A highly upset announcer when you saw your “mom” bleed.
A dancer in exchange for treats or attention. 
A ball-substitute that happily ran between people for attention when they lost the fetching ball.
A highly successful beggar of food morsels. 
A stealthy, compulsive and shameless kisser.
A flawless finder of all the good spots to mark during walks. 
A sniffer of only the good leaves.
A lantana leaf junkie.
An avid fan of the great outdoors.
A one-litter father.
A sneaky chocolate thief and a subsequent hydrogen-peroxide-induced-chocolate-removal survivor. 
A survivor of a Great Dane attack. 
A survivor of rat poisoning. 
A fearless yard defender from giant, Texas-size opossums and other non-fluffy tailed creatures. 
A vet's office protester. 
A hunger protester who only accepted hand-fed morsels from favorite, worthiness-self-assessed-people when overly excited or upset. 
A fierce women-of-the-house defender. 
A perverted, non-believer in bathroom privacy and a believer in a highly probable statistics of getting attention from a captive throne-sitter.
A connoisseur of sunspots. 
A beggar of corncobs. 
A mad-dash out of kennel morning-potty runner.
A post-morning potty-run torturer of teenage daughters and sleepover victims who refused to get out of bed.
A vehicle engine noise-recognizing greeter. 
An insistent and incredibly dashing sweater model. 
A sniffer of anything butt-like. 
An eager-to-please trick show-off. 
An equal opportunity game player with cats and dogs alike.
A little dude with a complete inability to hide naughty ideas with body language.
A greeter and fetch player, even over the phone. 
A stunningly comprehensive canine student of the English language. 
An unapologetic food snob who only ate Cheerios soaked with milk upon gaining the knowledge that they could be soaked in milk. 
A cheerful part of returning home each and every day. 
A sweet welcomed-guest-greeter and an intimidating unwelcomed-guest-greeter with the remarkable ability to always know the difference between the two with absolute, 100% accuracy. 
A stunner of veterinarians with your age, personality, and vigor for life. 
The gift that truly kept on giving.
An unrepentant thief of hearts. 
A beautiful dog, inside and out. 

Thanks for making everyone love you SO much, little dude.  You are sorely missed, and will always be remembered for everything you were to all of us.  Clearly, it was a LOT.


Wednesday, August 7, 2013

Pre-PAX Sky High Tabletop Play Benefitting Food Lifeline

Hello, readers!  I am co-hosting a charity dinner later this month, and thought some of you might be interested in attending.  100% of the proceeds go to a great charity, Food Lifeline.  Food Lifeline is a nonprofit organization dedicated to ending hunger in Western Washington.  Food Lifeline makes every penny count, and 95% of the food they receive from local, state and national contributors is donated.  Event details are below.

Who: Hopefully you, along with 249 of your closest friends or soon-to-be friends
What: Pre-PAX gaming party. A night of tabletop gaming, drinking, socializing, and general merriment from the absolute most scenic location in the entire West coast and the swankiest spot in Seattle, with 100% of all proceeds going to Food Lifeline.
When: Thursday, August 29th, 7:30 pm - 2:00 am
Where: Columbia Tower Club, 76th floor, downtown Seattle. Google map directions are available here.
Why: Because you're like us - you like to game. Because you want to kick off PAX in style. Because you'd like a tasty alcoholic beverage and a supplied meal whilst you play your games. Because you're bringing an S/O whom you would like to dazzle with the most stunning views imaginable (or to at least distract them long enough for you to play). Because you're traveling and want to go someplace special. And, most importantly, because you'd like to do all of this whilst supporting a fantastic charity - and getting a tax write-off in the process. That's a lot of wins in one package.

What's included in all ticket levels:
Up to 249 other people to game with
A game library that you can borrow from (feel free to BYOG, as well)
Dinner
Full (cash) bar access
Guaranteed seating! We will have more than enough seats for everyone attending, so no waiting to play games.
A pop-up game store to make acquisitions, if you so choose
A ticket-based drawing, with prizes including gift cards to many of Seattle's best restaurants, tabletop games - and, oh yes, PAX badges in case you struck out and want to go.
As all monies spent are going to Food Lifeline, all monies spent are 100% tax deductible
(Pending final acknowledgement) Representation from the Cookie Brigade, who will be giving away their delectable treats to raise funds for Child's Play

VIP ticket levels also get:
A swankier plated dinner
Drink vouchers
Free drawing tickets
Private-access gaming rooms, if you so desire
A bigger tax deduction

For more information, and to link up to buy tickets: www.dawgsledevents.com (big link at the top that reads "tickets on sale now" that will take you to the ticketing agent).
Direct link to ticket site: shindigg.com/Event/PZFMEiVs

Map of the event in relation to the PAX location:


Wednesday, May 8, 2013

Homemade Gnocchi

Before I get into my next post, I figure I should explain my absence.  I have been focusing on school lately, so I have been neglecting my blog.  Sorry, folks!  Don't worry, I've still been out and about and enjoying food as it should be enjoyed!  I just haven't had a whole lot of time to spend on writing things that aren't school assignments.  I figure for every hour I spend on my blog, that's one hour I am taking away from school time.  I'm allowing myself this one reprieve since this one won't take a whole lot of time to churn out.

Since a certain someone recently had some dental work done, he needs some soft foods for the next few weeks.  I offered to make one of my favorite dishes: homemade gnocchi!
The finished product

Some of my readers might remember me posting a link to Salumi's gnocchi recipe.  The original recipe can be found here:  http://chowhound.chow.com/topics/549147  Salumi's also has printed copies of their gnocchi recipe available near the cash register in their store (you can just nicely ask for a copy).  The previous recipe was posted in honor of their famous gnocchi maker, Aunt Izzy, who passed away in 2008.  These days, Mario Batali's mother makes it almost every Tuesday.  She's a really sweet lady.  You should stop and say hello sometime!  If you are more of a "visual learner" (like I am) and you have trouble following the recipe below, you could always stop by Salumi's on gnocchi day, and watch Mario's mother roll, cut, and strike the gnocchi from the storefront window!

Do you know the great thing about gnocchi?  It's very simple to make, and it's super cheap to make!  All you need is potatoes, eggs, flour, salt, cornmeal, your favorite sauce, and some of your favorite cheese (bread is optional).  That's it!  All together, this recipe takes ~1.5 hours to make, and about half of that time is spent waiting for the potatoes to boil.  All in all, it's very easy to make, and it's delicious! It does not keep very well in leftovers since the gnocchi will just turn into mush.  So if you were planning to make the whole recipe and only cook half of it, I have to strongly advise against that.  The dough will turn grey, and the gnocchi will be very mushy.  When you strike it the next day, the ridges will not hold very well.  If you decide to make all of it and eat the leftovers the next day, I don't recommend that either.  Let's put it this way: Salumi's will  not serve their gnocchi even to go, let alone leftover from the day before!  The texture gets mushy, and they simply will not compromise the quality of their gnocchi!

Special notes: 

This recipe can be halved, and I listed the halved ingredients below.  When halved, it will serve a generous portion for 2 or a regular sized portion for 3.  The instructions are mostly the same for doing a full batch vs. a half batch.  The only real difference is it takes less time with the halved recipe since you are cutting less gnocchi pieces!  

I also strongly recommend using a kitchen scale that can measure in grams. I also recommend purchasing a gnocchi board (they're ~$5), a pastry scraper or cutter, and a potato ricer.  If using the ricer I recommend, I suggest using the "fine" setting.  Through the Amazon link below, there's a very helpful instructional video for the ricer in the Amazon reviews.  If you do not have a ricer, you can use a large-hole cheese grater to break down the cooked potato into tiny bits.  Remember, you don't want big chunks in your gnocchi dough, so it does need to be broken down as best as it can be.  Kneading the dough also helps break down the potato chunks.   I have included a link for all of the recommended tools through the Amazon widget at the bottom of this post.  


Homemade Gnocchi

Ingredients - full size / half size

500 grams potatoes (approximately 1 lb) / 250 grams potatoes (approximately 1/2 lb) (Yukon Gold is recommended, though Russets or most other types of "starchy" potato can work too)
300 grams flour / 150 grams flour
2 eggs / 1 egg
2 tsp salt / 1 tsp salt

Salt for gnocchi boiling pot
~3 tbsp  + ~3 tbsp cornmeal / ~2 tbsp + ~1.5 tbsp cornmeal

Your favorite sauce (some form of marinara, spaghetti sauce, or meat sauce is recommended)
Parmigiano Reggiano cheese (or any other favorite cheese), grated

Optional: Small loaf of Italian bread or French baguette (for dipping and soaking up the leftover sauce) - 

Directions:

  1. Scrub but do not peel the potatoes.  Place the potatoes in a large pot of unsalted water, and bring it to a boil.  Cook until they are tender - approximately 30-40 minutes.  Cool and peel the potatoes while they are still warm.  Be sure to cut off any dark spots from the potatoes as well.  If you are short on time, you can peel the potatoes, cut them into large chunks, and then boil them for about 10-15 minutes.  However, I recommend boiling the potatoes whole since they will stay together easier, and you will "lose" less potato!
  2. Put a separate large pot of salted water onto boil while you prepare the gnocchi dough.  Alternatively, you can use the water from the potatoes you previously cooked, and you can just add salt to it.  If you are going to use the potato water, it is recommended to thoroughly scrub and then boil the potatoes whole, otherwise you will have too many little chunks of potato and dirt floating in your water.  Personally, I recommend just using a new pot of salted water.
  3. Put some flour down on your kneading surface, and press the potatoes through a ricer onto your floured surface.  Add the measured flour and salt so it makes a nice round mound, and make a hole in the middle of the mound - kind of like a small bird's next.  Crack the eggs into the hole.   
  4. With your fingers, break apart the egg yolk and mix it a little bit with the egg white.  Start to stir the dough mixture with your fingers, mixing the potatoes, salt, flour, and eggs together.  Once  you have mixed everything together and it's soft, knead the dough until it is smooth.  Set it aside for 5-15 minutes to let the gluten expand.
    These are all 4 stages of gnocchi dough. Starting from the upper left corner, going clockwise: the unformed dough, the dough after it's been formed and cut, the gnocchi after it has been "struck", and the dough after it is rolled out but before it is cut.  My gnocchi board and pastry cutter are also pictured.
  5. Flatten the ball to about a 1/2 inch thick rectangle shape, and cut the flattened side into 6 strips or so strips.
  6. Add more flour to your kneading surface if needed.  Roll one of the strips like a snake until it gets about as big around as your thumb.  You might have to break the piece in half or in three pieces as it gets longer.
  7. Take a butter knife or a pastry cutter and cut the "snakes" into pieces about as big as the length of the last knuckle of your index finger - a little more than half an inch.  The flour on the table should help keep the gnocchi from sticking together, but do not use too much.  Once you have cut all the gnocchi pieces, you can lightly roll them in the leftover flour.  This can also help prevent them from sticking to each other.  Remember, you want to keep the gnocchi relatively the same size since bigger gnocchi will have a longer cooking time.
  8. Roll the gnocchi on a fork or on a gnocchi board to "strike" the gnocchi and make ridges.  The ridges on the gnocchi helps the sauce stick to the gnocchi better.  Basically you roll it with the side of your thumb to make the impression on one side of the dough.  It will look a little bit like a bigger version of  "Velveeta shells and cheese."  It can take some practice.
  9. Take first measurement of cornmeal and spread it on a cookie sheet.  Place the "struck" pieces of gnocchi on the cookie sheet.  Since you don't want the gnocchi to stick to each other, try not to place the gnocchi on top of each other as best as you can.  Once the cookie sheet is full, spread the remaining cornmeal on top of the gnocchi and gently shake the cookie sheet to help roll the gnocchi in the cornmeal.  This will also help prevent the gnocchi from sticking together.
    This is the result from the half-recipe
  10. When the water is boiling, gently place half the gnocchi in the pot.  I typically use a fine mesh strainer spoon to place the gnocchi in the pot.  A "spider" wok tool will work too, as will a large slotted spoon.  I just like using as wide of a tool as possible so I can get as much gnocchi into the pot as possible at the same time, and I prefer to not just toss all the cornmeal into the pot and I don't want to run the risk of having "gnocchi mush" if the gnocchi gets stuck to each other while sliding off the cookie sheet.
  11. At first, the gnocchi will sink to the bottom.  After a minute or two, the gnocchi will float to the top.  Once it has floated to the top, cook it for one more minute.  (Hint: this is why you want to try to get all the gnocchi to be the same size and put it in the boiling water at the same time).  Once it has been cooking at the top of the water for one minute, scoop the gnocchi out and put it in a colander to drain.  Repeat for the remaining gnocchi.
  12. Serve the gnocchi in warm bowls with a couple spoonfuls of sauce, and grate some Parmigiano Reggiano cheese on top.  I typically serve it with some meat sauce, and I use some of my meatball meat I always keep in the freezer.  I will post another post with my meatball meat recipe in the near future!
  13. Enjoy!

For the nutritional values of this recipe, you can log it through the My Fitness Pal application.  Just search for "Salumi's Gnocchi (without sauce)"  Disclaimer: this nutritional value calculation is just an estimation, and it is based off 6 servings.  
http://www.myfitnesspal.com/recipe/view/44057413