Showing posts with label Seattle. Show all posts

Tuesday, May 5, 2015

We Have Pork Leg Steaks - What Now?

A few months ago, we went "halfsies" with a friend on a half of a pig.  For the most part, a lot of the pig has been sitting in the freezer without many ideas on what to do with it.  Sure, we know what to do with pork chops, ribs, ground pork, pork belly, etc.  Some of the cuts are a bit unfamiliar to us, so we have to get creative with them!

Fast forward to tonight, and we had a pork leg steak that we needed to use.  Chance pulled it out of the freezer the other day, and I was left with the responsibility of cooking dinner tonight.  He told me it was pork chops (and essentially, it is), so I looked up a recipe for pork chops.

Plus I needed to cook those fiddlehead ferns that were sitting in my fridge before they went bad.  It would be tragic if I let them go to waste!  Of course the real tragedy is their short availability season - late March through mid to late May.  They're my favorite side dish!  Sometimes I will just saute them with bacon, butter, garlic, salt and pepper.  I know, I know - it's cheating.  Of COURSE any vegetable would taste great that way!

I saw the label on this cut of meat and began to doubt myself.  He explained that I should just cook it like a pork chop and we will cut it in half after it is done.  So off I went!

I found a pork recipe that sounded good - mostly because I knew I had all of the ingredients in the kitchen and I wouldn't have to run to the store - and tweaked it.  So here is my entire dinner recipe, folks!


Balsamic Pork Chops/Leg Steaks

3 tbsp all-purpose flour
1 teaspoon of chopped rosemary (dried is fine)
1 pork leg steak
2 tbsp unsalted butter
2 tbsp olive oil
2 garlic cloves, crushed
1 2/3 cup chicken broth
1/3 cup fig balsamic vinegar (or whatever other balsamic vinegar you have in your pantry)
Salt & pepper, to taste


  1. Stir the flour, rosemary, and some salt and pepper together on a large plate to make a nice dredging flour.  
  2. Place the leg steak in the flour, and use a spoon to get some of the flour mixture in all of the little crevices.  Flour both sides of the leg steak.
  3. In a large skillet on medium-high heat, melt the butter together with the olive oil.  Put the crushed garlic cloves in the oil and let it simmer in the oil for about 1 minute.
  4. Place the flour-coated leg steak into the skillet and cook each side for about 4 minutes per side, or until golden.
  5. Remove the leg steak after cooking for 4 minutes on each side and set it on a plate.
  6. Pour the chicken broth and vinegar into the same skillet and use a whisk to scrape up any stuck on bits.  Reduce the mixture until about half of the liquid is gone - about 5 minutes.
  7. After the liquid has reduced, put the leg steak back into the skillet with the balsamic reduction and cook it for about another 6 minutes total.  You can flip the steak about halfway through so the liquid nicely coats both sides of the meat.
  8. Remove the leg steak from the skillet and cut it in half.  One leg steak should be two servings.
  9. Serve with a tablespoon or so of the balsamic sauce on top.


Fiddlehead Ferns and Yellow Squash

1 yellow squash, cut on a bias in 1/3 inch thick slices
1 lb fiddlehead ferns, washed to get the darker leaves off and end pieces trimmed
2 cloves of garlic, minced
2 tbsp butter
2 tbsp olive oil
1/3 cup chicken broth
2 tbsp "Dirt" brand Creole blend seasoning
Salt & pepper, to taste


  1. Put the butter and olive oil in a medium size skillet on medium heat.
  2. Stir the squash and fiddlehead ferns together in a bowl with the Dirt seasoning.
  3. Place the garlic, squash, and fiddlehead ferns in the skillet and stir.  
  4. About 10 minutes into the cooking process, add the chicken broth and stir.  If you prefer, you can add more dirt seasoning, salt and pepper, at this time.
  5. Cook for another 5 minutes, or until ferns are softened yet still a little crisp and the chicken broth has mostly boiled down.  I put the vegetables in the pan at the same time I put the leg steak in, and the vegetables took almost the same amount of time as the leg steak.  I just turned the heat down when the chicken broth had mostly boiled down.


Steamed rice

2 cups steamed rice, cooked per your rice cooker's instructions

Seriously, go buy a Zojirushi rice maker.  It will CHANGE you.  It keeps cooked rice perfect for almost 2 entire days!  Nope, I am not going to list instructions on how to cook rice!  Just pour some of that balsamic sauce on the rice, and serve with the rest of the above dinner items.

Enjoy!

Tuesday, January 27, 2015

Sous Vide Tomatoes Confit and Other Cute Christmas Food

Aah, sous vide.  It is the technology that has been around for several decades now, and you probably only recently heard of it through Kickstarter.

My partner and I attended a special Sous Vide cooking class hosted by Chef Jason Wilson at Crush a little over a year ago.  What a treat!

Sous vide is a beautiful way to infuse flavors together with slow, gentle, and consistent cooking throughout the entire food.  Jason talked about how different foods require different temperatures and cooking times through sous vide and how you have to bring food back to room temp with an ice bath to prevent harboring food pathogen growth (especially when it comes to animal proteins).  It is also much better to use some sort of vacuum sealed bag when using sous vide.  For one, the water is then able to form a better surface area to the food which allows for a more consistent cooking.  The pressure also helps the flavors infuse a lot better.

One of my favorite parts of the evening was when Jason demonstrated a compressed watermelon recipe.  First, he sealed the watermelon and other ingredients in a Food Saver bag and vacuumed it.  Then he showed us a pressure chamber sealed bag with the same ingredients.  What a difference it made!  The chamber sealer was able to form a much stronger vacuum than the Food Saver, so the watermelon was much darker (crushed slightly better, though not very different in size) in the chamber sealed bag vs. the Food Saver bag.  We already had a Food Saver machine at home, but about six months later, my partner dropped the hammer and bought a chamber sealer.  We love it!  That chamber sealer is great at sealing liquids.  The Food Saver tried to suck air out of the bag, whereas the chamber sealer created a negative pressure chamber to pressurize the bag.  Minimal air is left in the chamber sealed bags, and the Food Saver machines suck so much air - and liquid! - out of the bags, it can even cause itself to shut off due to overflowing the liquid catch tray.  It was very annoying.

We tried to thaw some frozen fish that had been sealed in Food Saver bags, and there was freezer burn on them.  This is almost never the case with our chamber sealed bags (within reason, of course).  It definitely has saved us quite a bit of money in the long run!


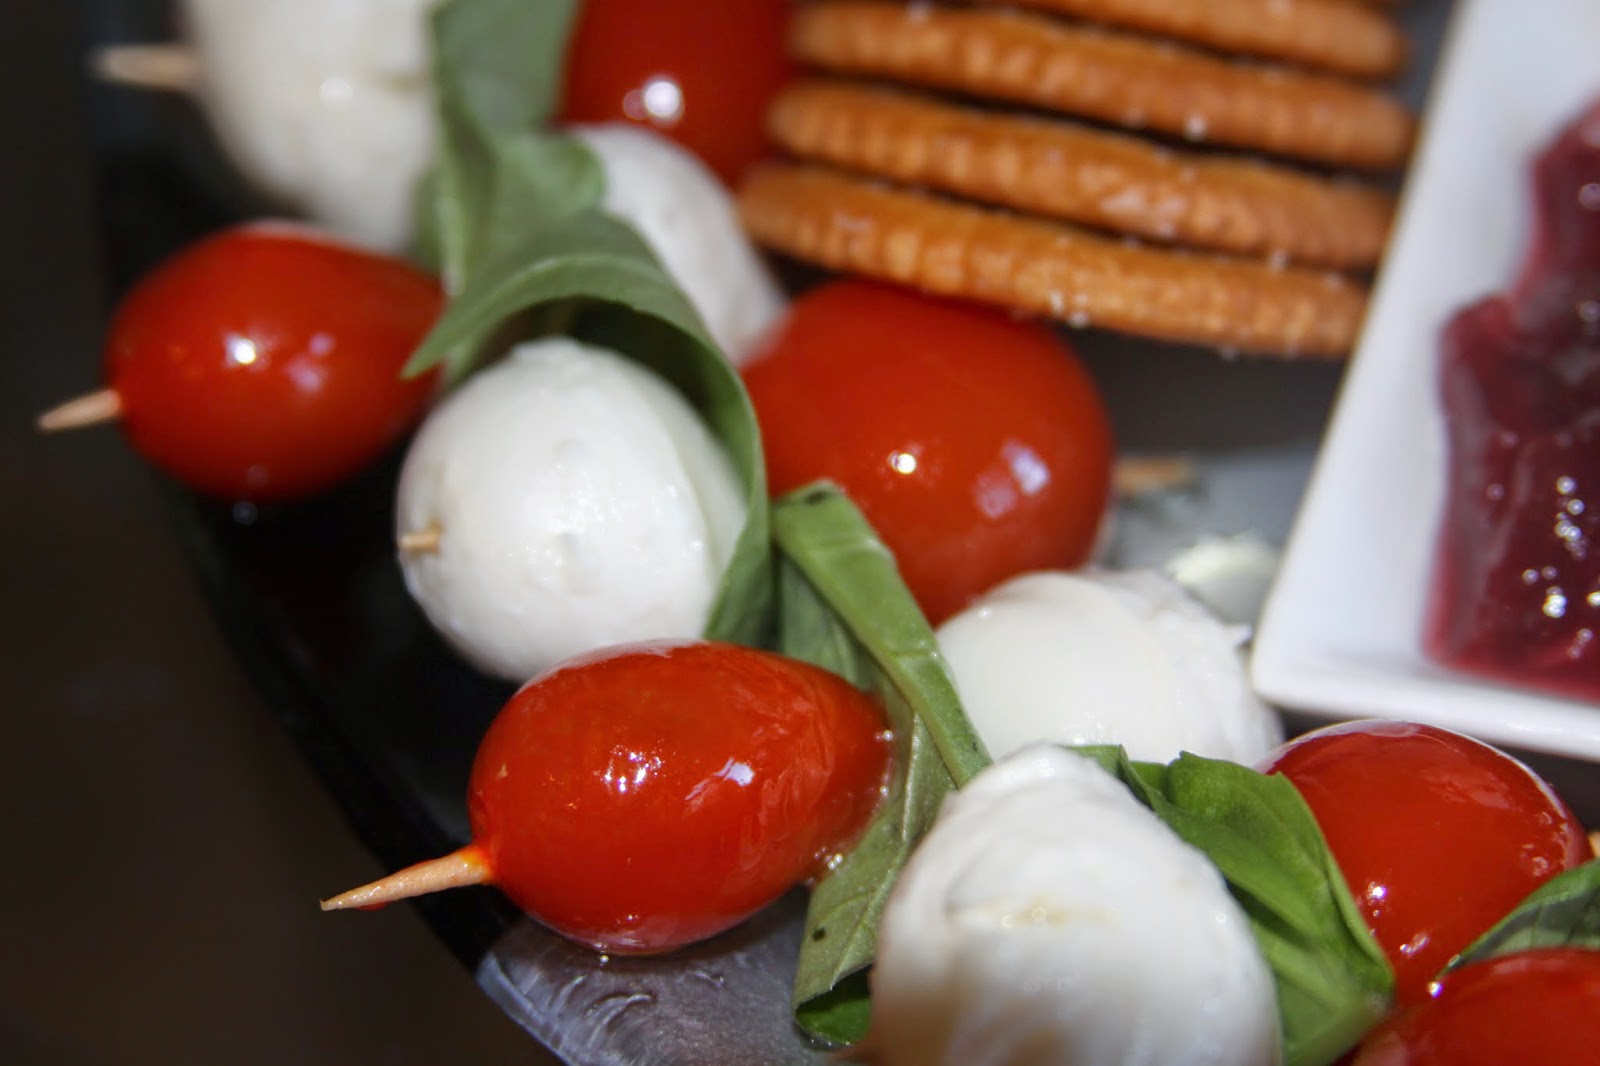
Since I know so many of you have purchased an Anova sous vide cooker through Kickstarter, I decided it would be a good time to share one of my favorite sous vide recipes.  One of my go-to recipes that I took away from Jason's class was a Sous Vide Tomato Confit.  It is so cheap, easy, and quick!  Our guests love it!  I serve it year round.  It's crazy to take a bite of a perfectly sealed cherry or grape tomato and you get a burst of basil, garlic, and chili flake flavor inside the tomato!  I sometimes serve it with some cherry size mozzarella balls.  It makes a beautiful "wreath" display when you put them on a stick - cherry tomato, basil leaf, and mozzarella ball.

With Jason's permission, I am posting this recipe for everyone out there.

Chef Jason Wilson's Tomato Confit

Oven bath temperature: 135F

1 pint cherry or baby heirloom tomatoes (or similar sized tomatoes)
10 leaves of fresh basil
1/2 cup extra virgin olive oil
1 bay leaf
1 tsp red chili flakes
5 cloves peeled garlic
Optional ingredient: 1 package of cherry size mozzarella balls

Procedure:

  1. In a small pan, simmer the garlic in olive oil for 2-3 minutes and remove just before they brown.
  2. Add all the ingredients to a vacuum bag and remove all air by pressing against a sink ledge or counter and expel the air.  
  3. "SEAL ONLY" the bag and place into the 135G water bath for 1 hour.
  4. Serve or preserve when timer sounds.


Optional steps:

  • Add some strained cherry size mozzarella balls and gently stir to coat the mozzarella with the confit juices.  
  • Drain the excess olive oil and refrigerate to serve cold or serve immediately.
  • For a cute "wreath" presentation, put a single cherry on a toothpick, then a small basil leaf, and then a cherry size mozzarella ball, and alternate the placement of the toothpick (cherry side next to the cheese side on the next stick, as pictured to the right).  Since some of the sous vide tomatoes will burst during the cooking process, be sure to double the amount of cherries for this recipe and try to use the soft but still-sealed cherry tomatoes on the toothpicks.  Sometimes they would ooze a little bit once they were pierced, and that was fine.  Just be gentle and pierce the tomatoes slowly; don't jab them or else you will send tomato juice flying across the table. For the rest of the tomatoes that didn't make the skewer cut, just eat them! 


I decided to get extra cute with it during the Christmas holiday time.  I made a cream cheese snowman as the centerpiece to an appetizer tray, and adorned the side with a wreath of sous vide tomatoes and mozzarella!  That was one delicious tray!

I wasn't fully prepared to make a snowman that day.  It was sort of a last minute thought.  I stood there in my kitchen asking myself "I do want to build a snowman, but what should I use to make the snowman's face?"  I wandered over to my spice rack and found some inspiration.  


Cream Cheese Snowman

2 8-oz packages of cream cheese
3 capers
1 apple (any reddish skinned apple will do)
7 pink peppercorns
1 japones chili pepper
2 black peppercorns
2 sleeves of Ritz crackers
2 sprigs of fresh dill
Robert Rothschild's sauce of your choice (pomegranate, raspberry, cherry, or mango flavors will suffice)

  1. Wash your hands thoroughly, but do not dry them.
  2. Take both packages of cream cheese out of the wrapper.
  3. With your hands wet, take one of the packages of cream cheese and try to form a ball shape as best as you can.  You can put it on the center of your serving tray and turn it like it is a pottery wheel, using your hand to shape it.
  4. For the second package of cream cheese, separate a wad of cream cheese that is about the size of a golf ball.  This will be for the snowman's head.
  5. Take the remaining cream cheese and form a second ball, slightly smaller than the base of your snowman.  This will be for his/her belly.  Make sure you keep your hands wet while trying to form the ball.
  6. Place the snowman's belly on top of the base and make sure they stick together nicely.  If necessary, you can sprinkle a little bit of water on it with your fingers and mold them together.
  7. Form the snowman's head with the remaining golf ball size cream cheese and place it on top of the snowman.  Make sure they stick together nicely.
  8. For the snowman's buttons, push 3 capers firmly in the snowman's belly.
  9. For the snowman's smile, push 7 pink peppercorns firmly in the snowman's face, but be careful not to push in too far.
  10. For the snowman's eyes, push 2 black peppercorns firmly in the snowman's face, again, be careful not to push in too far.
  11. For the snowman's nose, cut off the tip of a japones pepper and push it firmly into his face, again, be careful not to push it in too far.
  12. For the snowman's arms, push 1 sprig of fresh dill into each side of the upper part of the showman's belly.
  13. For the snowman's scarf, use a vegetable peeler to peel a long, continuous skin along the apple - about 1 & 1/2 to 2 times around the apple.  Wrap the skin around the snowman's neck.
  14. Place two sleeves of Ritz crackers around the circumference of the snowman base.
  15. Put a small ramekin of dipping sauce at the base of the snowman.
  16. Provide a small cheese knife or spreader to allow guests to scoop away at the snowman.
  17. Enjoy!

Tuesday, January 28, 2014

Gigante Beans by Any Means

When I try new foods, I'm often surprised at how fantastic they are.  Gigante beans are definitely one of those foods!  The first time I tried them, they were cooked Greek style.  I was thoroughly impressed!

A few months ago, one of my friends asked me if I was familiar with them and if I knew where to find some in bulk.  I was familiar with them, but I had no idea where to find them.  After at quick Google search, I figured out I could find them here in Seattle at Big John's PFI near the International District.  If you are a foodie in the Seattle area, you simply must go visit this store!

Low and behold, there they were - $4.99/lb for gigante beans.  Score!  The cheapest I could find them online was for $5.99 per pound plus shipping fees through Amazon .  Alternatively, I just purchased several pounds of them from Big John's and went home.  Now what?
After doing some searching for similar recipes to the one I had previously eaten, I pieced this recipe together.  I have to say it was superb!  It is definitely being added to our "cycle" of foods we make every so often.  Though it does take a bit of time, it can be broken up easily by soaking overnight, cooking them in the pressure cooker the next evening, and baking them the next day.  Or it can all be done one weekend afternoon.

This recipe can be easily doubled.  It yielded about 6 servings.  Alternatively, you could probably easily double all of the other ingredients in the recipe (except for gigante beans) and it would still be quite tasty.

1 lb dried gigante beans (soaked overnight, or at least 4 hours)
Water to soak the beans
Water to cook the beans in a pressure cooker
½ large onion, chopped (about 1 1/2 cups)
½ orange bell pepper, chopped into 1/2 inch pieces
½ red bell pepper, chopped into 1/2 inch pieces
1 – 14 ounce can diced tomatoes, preferably Italian seasoning
3 garlic cloves, minced
1 large carrot, sliced  into 1/2 inch discs, big disc pieces cut in half or quarters
1 stalk celery & leaves, chopped into 1/2 inch pieces
1 chicken bouillon cube, crumbled
1 tablespoon ketchup
1/3 cup coconut oil (or olive oil)
1/3 lb bacon, chopped (or 6 oz. bacon and 6 oz good quality pork sausage, cut up) (optional)
Ground pepper, to taste
Hot water to cook the beans in the baking dish
1 tablespoon fresh dill, minced
¼ cup (approx.) of crumbled Feta cheese


Directions:

  1. Cook the pre-soaked beans in a pressure cooker, with enough water to cover by one inch, for 20 minutes.  Depending on the style of pressure cooker you have, only count the 20 minutes once the pressure cooker has begun to whistle at regular intervals (for mine, this is about 3x a minute using a 5 lb weight).  Once the 20 minutes are up, turn the heat off the beans and leave them in the pressure cooker, undisturbed, for 2-3 hours before proceeding with recipe.  (Note: if you do not have a pressure cooker, cook the beans with 3 cups of water for every 1 cup of beans in a heavy saucepan with a lid.  Bring to a boil, reduce to a simmer and then cook them for 45 minutes to an 1 hr 30 minutes, depending on how fresh your beans are.  You might have to add cooking liquid if cooking for a long period of time.  I would suggest letting them sit in the water, covered, for at least 1 more hour after they are done cooking.)
  2. Preheat the oven to 400 degrees farenheit.
  3. Strain the beans and pour them into a large glass baking pan.  Note: it is okay if the beans are still a little firm at this point, but they should be plumped up quite nicely.
  4. Combine all of the remaining ingredients, except the dill, and mix well.
  5. Pour in enough hot water to cover beans by 1" in the baking dish.  Note: If the baking dish is not deep enough to cover the beans, pour enough water until it reaches 1“ from the top.  You only want to cover the beans 1” above where they originally came to in the pan before you added the other ingredients.
  6. Place the baking dish in oven and bake for 1 hour 45 minutes.  If you prefer to have your beans more tender, check the beans for the consistency after the 1 hour 45 minutes time is up.  If you want them to have a more tender texture, cook them for an additional 30 minutes.
  7. Stir the dill in, and bake for an additional 15 minutes.
  8. Remove the baking dish from the oven, and serve in bowls. 
  9. Top with a few crumbles of Feta cheese in each bowl, and enjoy!


For the nutritional values of this recipe, you can log it through the My Fitness Pal application.  Just search for "Larena's Gigante Beans."  Disclaimer: this nutritional value calculation is just an estimation, and it is based off 6 servings.  
http://www.myfitnesspal.com/recipe/view/44023960

Wednesday, May 8, 2013

Homemade Gnocchi

Before I get into my next post, I figure I should explain my absence.  I have been focusing on school lately, so I have been neglecting my blog.  Sorry, folks!  Don't worry, I've still been out and about and enjoying food as it should be enjoyed!  I just haven't had a whole lot of time to spend on writing things that aren't school assignments.  I figure for every hour I spend on my blog, that's one hour I am taking away from school time.  I'm allowing myself this one reprieve since this one won't take a whole lot of time to churn out.

Since a certain someone recently had some dental work done, he needs some soft foods for the next few weeks.  I offered to make one of my favorite dishes: homemade gnocchi!
The finished product

Some of my readers might remember me posting a link to Salumi's gnocchi recipe.  The original recipe can be found here:  http://chowhound.chow.com/topics/549147  Salumi's also has printed copies of their gnocchi recipe available near the cash register in their store (you can just nicely ask for a copy).  The previous recipe was posted in honor of their famous gnocchi maker, Aunt Izzy, who passed away in 2008.  These days, Mario Batali's mother makes it almost every Tuesday.  She's a really sweet lady.  You should stop and say hello sometime!  If you are more of a "visual learner" (like I am) and you have trouble following the recipe below, you could always stop by Salumi's on gnocchi day, and watch Mario's mother roll, cut, and strike the gnocchi from the storefront window!

Do you know the great thing about gnocchi?  It's very simple to make, and it's super cheap to make!  All you need is potatoes, eggs, flour, salt, cornmeal, your favorite sauce, and some of your favorite cheese (bread is optional).  That's it!  All together, this recipe takes ~1.5 hours to make, and about half of that time is spent waiting for the potatoes to boil.  All in all, it's very easy to make, and it's delicious! It does not keep very well in leftovers since the gnocchi will just turn into mush.  So if you were planning to make the whole recipe and only cook half of it, I have to strongly advise against that.  The dough will turn grey, and the gnocchi will be very mushy.  When you strike it the next day, the ridges will not hold very well.  If you decide to make all of it and eat the leftovers the next day, I don't recommend that either.  Let's put it this way: Salumi's will  not serve their gnocchi even to go, let alone leftover from the day before!  The texture gets mushy, and they simply will not compromise the quality of their gnocchi!

Special notes: 

This recipe can be halved, and I listed the halved ingredients below.  When halved, it will serve a generous portion for 2 or a regular sized portion for 3.  The instructions are mostly the same for doing a full batch vs. a half batch.  The only real difference is it takes less time with the halved recipe since you are cutting less gnocchi pieces!  

I also strongly recommend using a kitchen scale that can measure in grams. I also recommend purchasing a gnocchi board (they're ~$5), a pastry scraper or cutter, and a potato ricer.  If using the ricer I recommend, I suggest using the "fine" setting.  Through the Amazon link below, there's a very helpful instructional video for the ricer in the Amazon reviews.  If you do not have a ricer, you can use a large-hole cheese grater to break down the cooked potato into tiny bits.  Remember, you don't want big chunks in your gnocchi dough, so it does need to be broken down as best as it can be.  Kneading the dough also helps break down the potato chunks.   I have included a link for all of the recommended tools through the Amazon widget at the bottom of this post.  


Homemade Gnocchi

Ingredients - full size / half size

500 grams potatoes (approximately 1 lb) / 250 grams potatoes (approximately 1/2 lb) (Yukon Gold is recommended, though Russets or most other types of "starchy" potato can work too)
300 grams flour / 150 grams flour
2 eggs / 1 egg
2 tsp salt / 1 tsp salt

Salt for gnocchi boiling pot
~3 tbsp  + ~3 tbsp cornmeal / ~2 tbsp + ~1.5 tbsp cornmeal

Your favorite sauce (some form of marinara, spaghetti sauce, or meat sauce is recommended)
Parmigiano Reggiano cheese (or any other favorite cheese), grated

Optional: Small loaf of Italian bread or French baguette (for dipping and soaking up the leftover sauce) - 

Directions:

  1. Scrub but do not peel the potatoes.  Place the potatoes in a large pot of unsalted water, and bring it to a boil.  Cook until they are tender - approximately 30-40 minutes.  Cool and peel the potatoes while they are still warm.  Be sure to cut off any dark spots from the potatoes as well.  If you are short on time, you can peel the potatoes, cut them into large chunks, and then boil them for about 10-15 minutes.  However, I recommend boiling the potatoes whole since they will stay together easier, and you will "lose" less potato!
  2. Put a separate large pot of salted water onto boil while you prepare the gnocchi dough.  Alternatively, you can use the water from the potatoes you previously cooked, and you can just add salt to it.  If you are going to use the potato water, it is recommended to thoroughly scrub and then boil the potatoes whole, otherwise you will have too many little chunks of potato and dirt floating in your water.  Personally, I recommend just using a new pot of salted water.
  3. Put some flour down on your kneading surface, and press the potatoes through a ricer onto your floured surface.  Add the measured flour and salt so it makes a nice round mound, and make a hole in the middle of the mound - kind of like a small bird's next.  Crack the eggs into the hole.   
  4. With your fingers, break apart the egg yolk and mix it a little bit with the egg white.  Start to stir the dough mixture with your fingers, mixing the potatoes, salt, flour, and eggs together.  Once  you have mixed everything together and it's soft, knead the dough until it is smooth.  Set it aside for 5-15 minutes to let the gluten expand.
    These are all 4 stages of gnocchi dough. Starting from the upper left corner, going clockwise: the unformed dough, the dough after it's been formed and cut, the gnocchi after it has been "struck", and the dough after it is rolled out but before it is cut.  My gnocchi board and pastry cutter are also pictured.
  5. Flatten the ball to about a 1/2 inch thick rectangle shape, and cut the flattened side into 6 strips or so strips.
  6. Add more flour to your kneading surface if needed.  Roll one of the strips like a snake until it gets about as big around as your thumb.  You might have to break the piece in half or in three pieces as it gets longer.
  7. Take a butter knife or a pastry cutter and cut the "snakes" into pieces about as big as the length of the last knuckle of your index finger - a little more than half an inch.  The flour on the table should help keep the gnocchi from sticking together, but do not use too much.  Once you have cut all the gnocchi pieces, you can lightly roll them in the leftover flour.  This can also help prevent them from sticking to each other.  Remember, you want to keep the gnocchi relatively the same size since bigger gnocchi will have a longer cooking time.
  8. Roll the gnocchi on a fork or on a gnocchi board to "strike" the gnocchi and make ridges.  The ridges on the gnocchi helps the sauce stick to the gnocchi better.  Basically you roll it with the side of your thumb to make the impression on one side of the dough.  It will look a little bit like a bigger version of  "Velveeta shells and cheese."  It can take some practice.
  9. Take first measurement of cornmeal and spread it on a cookie sheet.  Place the "struck" pieces of gnocchi on the cookie sheet.  Since you don't want the gnocchi to stick to each other, try not to place the gnocchi on top of each other as best as you can.  Once the cookie sheet is full, spread the remaining cornmeal on top of the gnocchi and gently shake the cookie sheet to help roll the gnocchi in the cornmeal.  This will also help prevent the gnocchi from sticking together.
    This is the result from the half-recipe
  10. When the water is boiling, gently place half the gnocchi in the pot.  I typically use a fine mesh strainer spoon to place the gnocchi in the pot.  A "spider" wok tool will work too, as will a large slotted spoon.  I just like using as wide of a tool as possible so I can get as much gnocchi into the pot as possible at the same time, and I prefer to not just toss all the cornmeal into the pot and I don't want to run the risk of having "gnocchi mush" if the gnocchi gets stuck to each other while sliding off the cookie sheet.
  11. At first, the gnocchi will sink to the bottom.  After a minute or two, the gnocchi will float to the top.  Once it has floated to the top, cook it for one more minute.  (Hint: this is why you want to try to get all the gnocchi to be the same size and put it in the boiling water at the same time).  Once it has been cooking at the top of the water for one minute, scoop the gnocchi out and put it in a colander to drain.  Repeat for the remaining gnocchi.
  12. Serve the gnocchi in warm bowls with a couple spoonfuls of sauce, and grate some Parmigiano Reggiano cheese on top.  I typically serve it with some meat sauce, and I use some of my meatball meat I always keep in the freezer.  I will post another post with my meatball meat recipe in the near future!
  13. Enjoy!

For the nutritional values of this recipe, you can log it through the My Fitness Pal application.  Just search for "Salumi's Gnocchi (without sauce)"  Disclaimer: this nutritional value calculation is just an estimation, and it is based off 6 servings.  
http://www.myfitnesspal.com/recipe/view/44057413

Tuesday, July 24, 2012

Bite of Seattle 2012

As usual, the Bite of Seattle was a tasty, tasty blast!  The Bite of Seattle is always my favorite festival of the year.  There are plenty of food vendors to choose from, there's a comedy stage, and they even have cooking demonstrations! 

My favorite part of the event is always the Alley.  It's a program hosted by Tom Douglas, and it benefits Food Lifeline.  For $10, you get a plate with one featured sample from 7 local resterauteurs.  They do vary the menu day by day, and they had 15 total restaurants participating this year.  We always make sure to stop by Friday, Saturday, and Sunday.  96% of the proceeds go straight to the mouths of those who need it the most here in Western Washington.  Last year, funds raised by The Alley allowed Food Lifeline to provide nearly 86,000 nutritious meals to hungry people.  That's a huge benefit!  This really is a great cause, so I strongly encourage everyone to participate again next year and beyond.  Beyond that, it's a tasty, tasty charitable event, and it's a great way to try out 7 local restaurants in one sitting!  If find yourself at the Bite of Seattle and can't figure out what to pick for lunch or dinner, keep it simple and just go with the Alley!  There are always clear "winners" (and sometimes "losers") on the plate, so you'll be able to find out which restaurants you want to visit later on.


The Bite Cooks (sponsored by Viking) was wonderful too.  Oh, how I want one of those stoves!  She will be mine.  Oh yes, she will be mine...  As usual, Thierry Rautureau did a fantastic job as the emcee.  If you want to learn more about cooking, this is a great opportunity to learn some tips in the kitchen.  Thierry and some of the local chefs provided some excellent cooking tips (including some I covered in my video).  This is also a great opportunity to get out and meet some of your talented local executive chefs, sommeliers, and mixologists.  They also do audience give-aways if you pay attention and answer some questions at the end, and we made off with a nice little bonus!

Speaking of Thierry, don't forget to watch Thierry on the Top Chef Masters, Wednesday night, July 25th (tomorrow!) on Bravo.  Good luck, Thierry!  We're rooting for you!  Thierry is a simply amazing chef!  This is going to sound like a very "mom" thing to say, but he's already a winner in my eyes!  We would go to the viewing party at Luc tomorrow night, but it would be very late for us.  Of course, Thierry already knows the outcome, but he's under contract to not tell anyone who won. 

I was kind of surprised to find out they didn't have a camera crew filming the Bite Cooks event this year, so I'm significantly less bummed about losing the competition :)  But hey, budget cuts happen!  Fortunately Festivals Inc gave all of the contestants $50 in Bite Bucks due to their flawed voting system.  Hopefully they will fix the voting system next year.  Even though I truly don't care about the money, I don't think I'll bother with it again next year since the payout just isn't worth the effort.  But who knows, maybe one of these days I will start including video demos here on my blog.  Instructional video blogging is a lot of work - especially when you don't have a camera crew!  I did get a chance to meet Bonnie, one of my fellow contestants, and she was super sweet!  She would have been a great presenter too!  Oh, and yes, I did make my video private.  If you ever want to see it, you will need to send me a private message or put a comment on this page. 

A few of the featured chefs at the Bite Cooks have items featured on the foodie 100 list!  The Stumbling Goat has the Anderson Valley lamb T-bone on the Foodie 100 list.  We spoke to the executive chef, Joshua Theilen, at Stumbling Goat about this dish since we haven't had the opportunity to try it just yet.  We found out they are sourcing their lamb T-bones from a different place than Anderson Valley.  Obviously it's still a lamb T-bone, so it still counts!  We will have to go check them out sometime this week.  Incidentally, Joshua won the Bite Cooks Cook-off competition on Saturday, and he won $200 for his favorite charity.  Congrats, Joshua! 

Thanks to the Bite Cooks, I also found out about a wonderful winery called Sozo.  Sozo is a winery that helps provide anywhere from 1-25 meals (per bottle) for orphans, widows and homeless who lack basic needs.  The name "Sozo" is a greek word that means "to save."  Each bottle has a number on the front part of the label, and that number tells you how many people will be fed with your purchase.  That's right, you can drink wine *and* save lives, people!  I'll totally toast to that!  I know what you're thinking: "A charity wine?  It probably tastes like swill!"  You're dead wrong.  They had some wine to sample at the wine garden, and I tried a bottle of the Pinot Noir.  That was a fantastic Pinot Noir!  Their goal is to sell only quality wines while saving lifes, and they have a very talented and well-renowned vintner working for them.  When they go to restaurants to sell their wines, they don't even lead with the "This wine saves lives" bit.   They have the sommeliers and restaurant owners try the wines, and then they tell them what they're all about.  The only downside is that you can't just go out to a grocery store and buy their wine.  You can find it on their website (link above) and at some local restaurants.  They also had some bottles for sale at the wine garden, so I picked up a bottle.  That's right, I saved 10 lives by adding a bottle to my wine fridge.  Everyone's happy!  If you want some great quality wines with an even better excuse to drink - check them out!

I couldn't help but notice there were significantly less vendors this year than there were last year.  Out of sheer curiosity, I looked up the booth prices.

$350 for a Hand-crafted or specialty food product booth (not too bad)
$1700 + 16% of sales for a 10x10 Restaurant Booth (16%?  ouch!)
$2975 + 16% of sales for a 20x10 Restaurant Booth (dang!)
$3175 + 16% of sales for a 20x20 Restaurant Booth (double dang!)

I get that the festival doesn't charge admission, so they have to make their money somewhere.  I was really astonished to find out how much they charge the food vendors!  Wow.  So get out there and support your local food vendors!

The Comedy Stage also had a few talented comedians ... and they had a few "eh" comedians in my opinion (but hey, I'll be nice and won't name names!).  Kermit Apio was a hoot!  With a little bit of self-deprecating humor combined with some very important life lessons for the gentlement out there, he had a great routine!  You should definitely check him out if he ever tours through your area.

All in all, it really was a great festival!  If you didn't get to check it out this year, you missed out!  There's always next year!  It will probably be July 19-21 2013, so mark your calendars!

Monday, July 16, 2012

Foodie 100 List - Altaye Ethiopian Restaurant

Since the Alligator Soul is now closed, I officially move to replace the crawfish etoufee with the Altaye Special at Altaye Ethiopian Restaurant on the Seattle Foodie 100 list.  I've already had one person second the motion, and several have been in favor.  There.  It's a done deal.  You're welcome!  Sadly, I have not yet figured out how to have the owner of the list update it with changes like this.

Simply put, Altaye is one of Seattle's best hidden gems.  Located at 8135 Rainier Avenue South in Seattle, you will find one of the most welcoming restaurants in all of Seattle.  It's in a rather small and unassuming building, but do not be deterred by appearances.  The owners, Essa and Titi, are incredibly friendly, and they serve up some spectacular food for great prices!  If something were to happen to this restaurant, I would pitch an unabashed fit!

If you've never had Ethiopian food before, you need to head over to this place.  Fair warning though: you might not like Ethiopian food at other restaurants once you've tried this place!  I make no apologies for the fact that knowledge of this restaurant's food will ruin other Ethiopian food for you!  I've had Ethiopian food at other establishments, and it was just not good at all.  NOT good, I tell you.  We're talking the  "Wow, dinner last night just wasn't a good idea" kind of not good.  No, I won't publicly name names, though you can probably figure it out if you do some hunting. 

Where you're going: you don't need forks. Since you will be eating with your fingers, just wash your hands (they do have a restroom available), and get ready to be dazzled!  To describe Ethiopian food, I would say it's similar to Indian food, but there won't be any rice or naan. If that description turns you off - don't be misled.   You will love this stuff!  Hey, you never know if you like or dislike something until you've tried it, right?  Eat it!  It tastes good, I promise!  Let them know that you've never had Ethiopian food, and they will guide you through the process.  If you are a vegetarian, they will provide some wonderful lentils and a wide array of vegetable sides. 

If you decide to stop by just for lunch or dinner, you should order the Altaye Special.  For $12.95, you will receive a huge plate of food with a side of unlimited injera bread.  The special will feed 2 easily.  That's right, for less than $7/person, you will leave feeling as happy as a stuffed tick at a nudist camp!  Their sambusas are great too, though the Altaye Special will be more than enough for you.  The first time we went here, we ordered 2 sambusas and 2 specials, and Essa reined us back in since that would have been way more food than we needed.  I give them mad props for not trying to upsell us on food!

What is injera, you ask?  Injera is a crepe flat bread, and the pores that form on the top of the bread help soak up some of the yummy goodness on your plate.  Titi makes the injera herself every day, and she even grinds the flour herself!  It is made from teff flour, so for those with Celiac disease, yes it is a gluten-free bread.  It does have a slightly sour taste, though it's not nearly as sour as sourdough.  A friend once had enjera bread (from somewhere else across the world in England) that tasted like dirty dishsoap.  Let's suffice it to say - they didn't do it right.  Some places don't use true teff flour, so if you've had bad injera experiences at other Ethiopian restaurants, that might have been part of the culprit. 

I mentioned you don't need forks, right?  Basically the way you eat Ethiopian food is you tear off a piece about the size of 2 to 3 of your fingers, and you scoop up the food with the injera.  Think of it like a mini-taco.  Once you've started to clear some space on your plate, eat some of the injera at the bottom of your plate.  It will be even tastier than the other injera since it has all of the food flavors thoroughly soaked into it.

When we order, we usually get the Altaye Special plus an order of the chicken tibs (pictured in the bowl), and we specially request them to be extra-extra spicy.  For those of you who enjoy spicy food, this is one of the few places in Seattle where you can request some spicy and delicious food!  Those chicken tibs are superb!  My stomach doesn't handle spicy food very well, but I am unable to control myself when Titi's chicken tibs are at stake. 

When you order the Altaye Special, you will notice some white cottage-cheese type of stuff on the platter.  That is the eyeb (also known as aib, ayib, iab, etc).  Save that for last.  Basically it's very similar to a dry cottage cheese, and it's to help calm your stomach down after you throw so many foreign spices and flavors at it.  If you're lactose-intolerant, I can't help you there.  If you have a particularly sensitive stomach like I do, feel free to ask for a little extra eyeb.  Just make sure that is the last thing you toss down your gullet!

A few times a year, I host a group event here for some friends through the Yelp and Meetup crowd. For $10 per person (the group rate), you get all of the food you could possibly desire.   She usually serves a few extra options than you will normally find on the Altaye Special.  If you would like to join us for one of our group events, feel free to leave a comment or send me an email.  Just let me know if you require a vegetarian meal or if you have any food allergies.  The picture on the left is a platter for 4 people. 

Never once have any of my guests said "Eh, it was alright" when they were done.  Don't let the surrounding location deter you.   We've parked on the street hidden our valuables (be smart, people - you should never do this anywhere!), and we've never had any issues.  Sure, it's not in the most desirable part of town (by Seattle standards), but it's still not bad.   The food is at a great price, service is superb, and the food is simply the best Ethiopian food in town!

In summary, there are a few staples at every Ethiopian restaurant:

1) Tasty, fresh injera bread = Altaye gets a check in this category.
2) Warm fuzzies from the restaurant owners = Altaye gets a check-plus-plus in this category.  This place is also very kid-friendly.  Titi just loves children, and they adore her!
3) Tasty, tasty noms = Altaye also gets a check-plus-plus in this category.  The flavors might be a little foreign to those with limited food experiences, but they're great!

Thursday, July 5, 2012

Foodie 100 list - Chicken and Asparagus Risotto - Il Terrazzo Carmine

At Il Terrazzo Carmine, there is a chicken and asparagus risotto on the Foodie 100 list.  I scoped out their menu online, and I noticed only a mention of the risotto of the day.  So I decided to call ahead and ask about the chicken asparagus risotto.

They said since the risotto changes daily, we should specifically request the chicken asparagus risotto with a little bit of advance notice.  When I made my reservation for the next day, I requested the dish.  They happily obliged!

The restaurant itself was a little difficult to find.  Signage is a little odd from 1st Avenue since a lot of the pictures are from the main entrance from the patio area.  To reach this restaurant from 1st street, you go through the building lobby, through the restaurant's back door.  The ambiance is very nice, and the wine menu is very extensive.

We were seated promptly and offered some bread to nosh on.  We also ordered some bruschetta as an appetizer.  It was kind of mediocre.  The tomatoes should have been mixed with the basil a little better.  The bread was also incredibly tough, and the olive oil messily seeped through the giant holes in the bread.

The chicken asparagus risotto was very well prepared.  It is a rather large portion.  The risotto was cooked just right, and it had a great flavor to it.  Though the flavor was a one that I grew tired of before the plate was finished.  If you're craving a risotto, I would still recommend it since it was so well prepared.

I ordered the cannoli for dessert.  They were a bit gritty and also mediocre.  I've made cannoli's before, so I know it's not easy to get rid of that gritty texture.  Perhaps a little more investigating is needed?

Service was prompt, friendly, and very attentive.  Prices weren't completely unreasonable.  It's a lovely Italian restaurant, and I would still go back to try some of their other dishes! I certainly enjoyed it much more than the Pink Door.

Foodie 100 list - Theo Chocolate

Since we are still working on knocking out the last few of the items on the Foodie 100 list this week, we decided to go do the Theo Chocolates tour today.  The name "Theo Chocolate" originates from the Greek name of the cacoa tree - Theobroma Cacao. 

For $6 (credit cards accepted), they will give you about a 1 hour tour through their little factory.  You will need to reserve your tour in advance, though there isn't a way to pay for the tour in advance online.  You can reserve your tour on their website at: http://www.theochocolate.com/.

We arrived a bit early for our tour, so we decided to stop by the storefront.  They had about a dozen different samples of some of their chocolates.  That's right, you can cross this foodie item off your list for free!  My favorite was the salted almond milk chocolate.

When we paid for the tour tickets, they handed us some hairnets for obvious sanitary reasons.  They asked if we were wearing sandals (which we weren't), though they will give you little booties for your sandals if you are.  They requested to tuck every bit of hair possible and any dangling earrings into the hairnet.  For the gentlemen with beards (or for any ladies with hypertrichosis!), they will hand you a beard net.

You would think there are more chocolate factories out there, but in fact there are only about 20 other chocolate factories in the US.  Sure, there are plenty of other chocolate "melters" in the US, but Theo is one of the few chocolate makers in America.

The tour guide walked us through the process of harvesting the cacoa bean and getting it to their factory.  Did you know that cacoa pods grow on the trunks and lower branches of the tree?  They are also hand-picked since an automated machine would probably damage any new growth from the cacoa trees.

She passed around samples of the chocolates while she spoke.  She explained that we were going to experience the chocolates in order of dark chocolates to milk chocolates so we wouldn't experience palate fatigue from the sweetness of the milk chocolates.  I am a huge fan of milk chocolate, so I had to be patient!

I was quite surprised to find out exactly how many cacoa beans it takes to make just a 3 oz chocolate bar.  It was a lot - enough beans for about 3 pods!  They also use only organic products to make their chocolates, and they only participate in the fair trade program.  Basically the fair trade program is for giving the cacoa farmers a liveable wage, access to healthcare and education for their children, and they don't allow child labor.  That's pretty much awesome!

Our tour guide then walked us through the factory and explained what each machine does.  She also showed us the shell coating of the cacoa bean that they sell as mulch.  That was the best selling mulch I have ever smelled in my life!  When I buy my own house and start doing some flower beds, I'm coming back here for some mulch!

She then took us to the kitchen where we sampled some chocolate covered caramels and ganaches.  Most of the people working in the kitchen came from a culinary background, so they had some very interesting combinations stuff going on in there. 

After the kitchen portion was over, the tour was pretty much done.  They do offer the tour patrons 10% off of the fresh treats behind the glass pane.

All in all, it's an interesting tour.  I would recommend it.  It would be fun to do as a date thing, though fair warning: you and your date are not going to look very sexy with your hairnets.  There just isn't a way to get around that!

Thursday, June 28, 2012

Bite of Seattle - Bite Cooks Video Competition


For the last 30 years, the Bite of Seattle has been one of the biggest festivals in the Pacific Northwest. In 2003, there were 60 restaurants participating with over 450,000 visitors. That is a LOT of foot traffic!
The Bite of Seattle is by far my absolute favorite festival in the Pacific Northwest. This year will be my third year in a row. One of my favorite parts of it is The Bite Cooks event!

The Bite Cooks! is an interactive and high energy live cooking entertainment showcase located on the Fisher rooftop for everyone to enjoy. Participants include some of Seattle’s finest chefs and local culinary experts who will spice up the stage with creative programming segments and cooking demonstrations. Local chefs will compete in a Bite Cook Off!, where they will be given three mystery ingredients, a small pantry of basic cooking staples and leave it up to the audience to judge there final entrée. The winner will be crowned The Bite Cooks Master! All demonstrations will be done on a fully-equipped stage provided by Viking. Mmm, Viking.

They have recorded this event indoors for the last few years, though this year they are going outdoors. I hope the weather cooperates!


Over the last few years, I've had several friends tell me "You should have your own cooking show!"


Alrighty, friends: now it's time to put your money where your mouth is.  Well, actually it's time to put your votes (via mouse-clicking) where your mouth is!

This year, for the second year in a row, The Bite Cooks is holding a home video contest.  Home chefs are invited to prepare a recipe that represents "Fresh Northwest" cuisine, and demonstrate the recipe in a 20 minute video.  The winner will receive $100 in "Bite Bucks" certificates and $350 worth of Viking kitchenware.  Mmm, Viking.  Beyond that, the winner gets 20 minutes of fame (albeit on local tv ... through Comcast) to demonstrate their recipe with Thierry Rautureau.

I was not aware of this contest last year, but I am totally participating this year!  I am super excited to submit my video!  :)  In case you can't tell, I love learning and sharing knowledge with others - especially when it comes to food!

Now, this is the part where I must shamlessly ask my friends to get out there and vote for my video! Pretty please?  Sorry for the low production value of it.  What can I say?  I'm more of a videographer than a chef!


Here is the link to vote for my video. Please feel free to forward this to your friends and get the word out. Even if people do not want to vote, I at least hope they can learn something and enjoy the video!

I've sort of racked my brain to select a recipe to submit to the contest, and I have put a LOT of work into this video.  I have plenty of great recipes to submit, though they might not all work well for a 20 minute segment.  Plus they don't all fit with the "Fresh Northwest" theme since I'm not originally from the Northwest.  Barbecue contest?  Oh yes!  Tex-Mex cuisine contest?  The judges in this region wouldn't know what hit them!  Baking competition?  The fat kid within me squeals with delight!  Recipes using bacon?  Oh it would be ON!  Northwest (summer) cuisine?  Oh, hrm...  Yeah, it was difficult, but I think I've picked a winner.  I hope the judges think so too!

Wish me luck!

Tuesday, June 26, 2012

What to do with a chub of Salumi's salami?

I recently sent a very dear friend the most glorious gift anyone could possibly send: the gift ... of pork.  *cue the angels standing below the Salumi's flag, singing an aria chorus as they look up into the heavens*

Of course this friend doesn't truly know how glorious this gift is just yet.  You see, I sent this salami chub to a friend in Texas.  She has only tried salami from the local grocery store chain called H-E-B in Texas.  Obviously this had to be remedied!  Don't get me wrong, I still love H-E-B (and miss that place immensely!).  They're just not known for their quality salami.  Now that I think about it, I'm not sure if I did her a true "favor" since she will be forever spoiled!

So she received her chub of Salumi's DaVino salami in the mail yesterday, and she sent me a message saying "It smells wonderful.  Now what to do with it?!?"

We-heh-heh-hell then.  First of all, the best thing to do with a perfect artisan salami chub is to cut it with a meat slicer.  If you don't have one, call around to your local deli or butcher and ask if they will cut it for you.  Some places will charge a nominal fee - $.50 or so - to slice meat.  You want to slice it very thin - thin enough where you can sort of see through it and you won't have to really bite down your teeth to cut through it.  You don't want it sliced so thinly that your slicer isn't able to capture a fully-round circle with it.  My slicer will do that with the lowest setting sometimes.  That's right, folks, I have a meat slicer in my kitchen.  I'm not even sorry.  I included a link for it in my widget below in case anyone is interested.

You can create a sandwich just like Salumi's would!  You can use sticcole or giuseppe bread (think: ciabatta bread).  Add some olive oil with some finely minced garlic as a base to the bread, add some olive tapenade, provolone cheese, lots of salami (maybe about 2 layers of very thinly sliced salami), some grilled onions and Italian peppers (pepperoncini's if you like them).

I would also strongly recommend putting the salami on a pizza.  My personal favorite combination is pepperoni, white onions, and some Italian sausage on it.  Need specifics?

Fine, you twisted my arm.  I am hereby giving you my pizza crust recipe.  That's right, my very own first recipe that I am sharing on this blog.  I am making blog history today!  Of course I reserve the right to perfect it and not tell you how I've tweaked it.  You get what you pay for, folks! :)


Larena's deep dish pizza dough

  • 1 1/2 cups of warm water (105-115 degrees)
  • 1 package of active dry yeast, or 2 1/4 teaspoons if you use yeast from the jar
  • 2 Tbsp olive oil
  • 2 teaspoons of Kosher salt
  • 1 teaspoon of sugar
  • 3 1/2 cups of bread flour
  • extra olive oil for the baking pan
In a large bowl (preferably a KitchenAid stand mixer bowl), add your warm water, and sprinkle the yeast onto the surface of the water.  Let it sit for 5 minutes until the yeast is bloomed and dissolved. Basically you want to see lots of bubbles that moved around, and you shouldn't see granules of yeast anymore.  If the yeast is not dissolved at the end of the 5 minutes, stir it completely to finish dissolving.  Tip: If you have a clear glass KitchenAid bowl, it will be easier to see when it is fully dissolved.  Also, make sure your yeast is not expired!  If you use regular flour instead of bread flour, your crust will be just a little more tough.

In a separate bowl, mix the flour, salt, and sugar and whisk the ingredients together. 

Next, add your regular mixing paddle to the mixer.  Add in the dry ingredients and the olive oil to the bowl, and mix at a low speed for 1 minute.

Remove your mixing paddle and replace it with the dough hook.  If you do not have a stand mixer or a dough hook attachment, then you will need to start kneading old school style!  Knead using the dough hook on low to medium speed until the dough is smooth and elastic.  This will take about 10 minutes with the stand mixer.  If the dough still seems too wet, sprinkle it with a little more flour. 

Lightly coat the inside of a large glass or metal bowl with olive oil.  Toss the dough into the bowl, and turn the dough until it is nicely coated with oil.  Loosely cover the bowl with plastic wrap, and set it in a warm place until it has doubled in size.  I recommend either putting it in a (clean) dishwasher near the heating element after it had finished a cycle (don't turn the dishwasher on while the bread is in there!), or you can heat your oven to 150-175 degrees, turn off the oven, and place the bowl into the warm oven.

Using a deep metal baking dish, coat the bottom of the pan with a bit of olive oil.  Tip: You do not want to use a glass baking dish because it will make the dough soggy.  A metal baking dish will ensure a crisp crust bottom.  Take the dough out of the bowl, and spread it around the bottom of the metal baking dish - to the edges - until it largely resembles the shape of your dish.  Press the dough all along the bottom of the baking dish to prevent bubbles.

For the actual pizza, preheat your oven to 450 degrees.  Coat with your favorite pizza sauce (according to your taste), lightly sprinkle some Italian herbs or Herbs de Provence, spread about 2-4 cups (according to your taste) of mozzarella cheese, and add the Salumi's salami, white onions, pepperoni, and (cooked and cooled) Italian sausage.  Bake for 30 minutes, or until the cheese is fully melted and has a few golden spots.  The crust should be a nice light golden color.

Enjoy!

Today, a friend asked me for cookware recommendations.  I cannot recommend Viking and All-Clad enough!  Their stainless steel pans are awesome.  I am including a link below in my widget.  Don't bother spending the extra money for the copper core pans.  Maybe one day I will post a blog about what each pan is purposed for!

Monday, June 25, 2012

Foodportunity - Summer 2012

Tonight was the Foodportunity event for summer 2012.  Of course, good eats were abundant!  Tom Douglas is the host of this event, and it was packed and sold out as usual.

This is the second time I've been to this event, though it was my first time as a blogger.  This is a great event to get out there to meet your fellow bloggers and food enthusiasts.  It's also a great opportunity to get to know some of your local chefs.

The chefs try to bring their A-game here.  We have so many great James Beard award winners in this city.  They know the crowd loves gourmet food, so they do try to impress!  If you aren't familiar with the James Beard award, well, basically it's the Oscar of the food world.

My first time visiting here, I was just a food enthusiast.  Now that I'm blogging more, I decided to plug it a little bit at the event.  I even got my first tchotchke as an official blogger: a little gift bag from Chocopolis for bloggers!  Aww :)

I had the foodportunity to meet the mother of local chef, Wayne Johnson.  Wayne participated in an Iron Chef competition, and was a former chef at Andaluca.  Now he is the Executive Chef at Ray's Boathouse.  I also learned that at the Iron Chef, they give you a list of food items the "secret ingredient" could possibly be in advance.  You truly only get one hour, but at least you get to have some brain-storming in advance.  I didn't know this about that competition!

As always, it was nice to see one of my favorite local chefs there, Thierry Rautureau.  He owns Luc and Rover's here in Seattle.  He's such a nice man, and an even more amazing chef!  If I were Oprah-rich, I'd try to steal him away as my private chef!  Alas, Thierry, don't get your hopes up.  There is only one Oprah out there, and I am not her!

I wish my camera phone was working.  I would post more photos from the event if it had been.

Who knows, maybe at the next Foodportunity event I will have my own teeny-tiny-small-time award to my name :)

Thursday, June 7, 2012

Sunset Supper - my favorite item on the Foodie 100 list!

Once a year, Pike Place Market holds their annual Sunset Supper fundraising event.  All proceeds support the work of the Pike Market Medical Clinic, Senior Center, Child Care & Preschool and Food Bank – vital services utilized by thousands of Seattle’s low-income and elderly residents.  The Pike Place Market zoning regulates that the vendors all have to sell a certain percentage of their items at very affordable rates to accomodate the local residents within the zone, so their prices are not all "incredibly overpriced" like one might think.  The Pike Place Market is definitely one of Seattle's greatest treasures, and they absolutely deserve your support!

This year, the Sunset Supper falls on Friday, August 17th, 2012.  It's usually held on a Friday.  Trust me when I say this, folks: this is not an event to be missed!  It is absolutely my favorite item on the Seattle Foodie 100 list!

At this event, they have about 60+ food/wine/beer vendors with samples galore. 

If you leave this event feeling hungry: you didn't do it right. 
If you leave this thing feeling sober: you didn't do it right, though that's probably okay...
If you leave this thing without a food baby in your stomach: you didn't do it right, though maybe that's a good thing too...

You really need to bring a designated driver and your fat pants to this event.  I wore an a-line dress, and I left this event with a noticeable food baby!  Even my dude said "Wow, I am not gonna lie, babe... it *is* noticeable."  I wasn't even sorry!  As one of my good friends from Texas would say: you will leave this place feeling as happy as a stuffed tick at a nudist camp!

Some of the best of the best restaurants in all of Seattle participate in this event.  If you don't have the budget or time to get out and try all of these different places, this is your big opportunity to have little samples from everybody.  This way you get to discover the establishments you want to visit again!

Be sure to bring about $10 cash in order to "upgrade" your plate to one of the plastic plates with a wine notch cut out in it.  They didn't charge $10 last year, but it's always good to have a little bit of extra cash in case they have similar additional offerings .  It will make your evening so much easier to avoid having your hands so full!  Also, if you really like some of the wines, write them down.  You won't remember them the next day ;)  Though you don't want to completely blow away your palate by trying too many wines.  Consuming that many tannins will work a number on your tastebuds.

Also, be sure to bring your CC to this event for 2 reasons:

1) They offer little spin the wheel raffles, and you are guaranteed to get at least your money back - usually doubled - in certificates and prizes.  It goes to a good cause, so why not?  If you get a certificate you don't want, ask someone in line behind you if they would like to trade.

2) Last year they also offered Seattle Celebrated Chefs cookbooks if you register one of your credit cards to the Dine Around Seattle program.  The program is for participating restaurants to donate a small portion (somewhere between 1-2% if I recall correctly) of their proceeds to a great cause.  They had some of the published chefs onsite to autograph the book.  I'm not sure if they're going to do the same thing again this year, though I'd imagine they will.

For more information about this event and for ticketing information, check out the Pike Place Sunset Supper webpage here.

I do recommend going at the Patron level if you can.  I heard a rumor that they were going to offer a gift bag of some sort, though I haven't been able to substantiate that rumor.  If you ask me, it's worth the money for the extra 1 hour of non-cattle-call selecting of food items.  It gets super crowded when they let everyone into the event.  Sure, people might give you the "stank" eye for being there ahead of everybody, but you earned it with your financial support.  Enjoy it!  Personally, I wouldn't recommend going the "reserved" route over the "general admission" since you will be able to find a place to enjoy your food in solitude.  Or really, you just might eat the sample as they are given to you. 

Make sure you get your tickets before 7/16!  The prices will go up significantly if you wait too long!  Also, don't count on getting last minute tickets.  This event usually sells out, so now you have two reasons to get tickets in advance.

Sunday, June 3, 2012

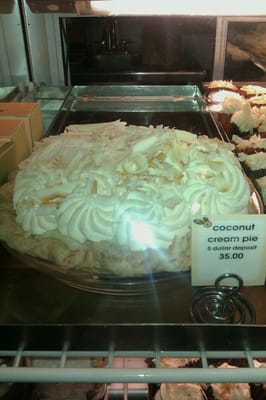
Foodie 100 list - Tom Douglas' Triple Coconut Cream Pie

Long before I even knew of this Foodie 100 list's existence, the very first item I ever had from the Foodie 100 list was Tom Douglas' Triple Coconut Cream Pie.  My grandma used to make a coconut cream pie that was pretty good.  I'm sorry grandma, but Tom's got you trumped!

I first tried this back in September 2008 during my very first visit to Seattle.  Chance took me to the Dahlia Bakery, and he ordered 2 slices of the pie to go.  I'm very glad he ordered 2 because I probably would've stabbed him with my plastic fork to get the last few bites.  Since it was in the early part of our relationship, that could have made things awkward...  I licked that cardboard after I was done, and I wasn't even sorry!

I get that coconut is one of those polarizing foods - people either love it or hate it.  Most people who hate it hate it for the texture.  Up until the first time I came to Seattle, I had never even seen the wide coconut flakes.  They always just sold shredded coconut at the stores in Texas, so I guess I could understand why people wouldn't like the coconut shreds getting stuck in their teeth.  This pie uses mostly coconut flakes, and only some shreds in the actual filling, so that would negate most of the arguments against coconut.

In all seriousness, this triple coconut cream pie... it's just so.. so.. beautiful.  It's like Mary Poppins.  It's practically perfect in every way.  It has most definitely earned its spot on the Seattle Foodie 100 list!

They bake coconut shreds into the crust.  They top it with coconut flakes and white chocolate flakes.  It's a very high pie, and it's just delicious!  They sell it in little bites if you just want a little taste because you're diabetic or you hate coconut.  They sell it by the slice, a half-pie, and a full pie.  It is pretty expensive to buy the full pie, but it's SO delicious!

Even if you're not after this pie, you can still get other things in this bakery that will still give you that cooking show O-face (except this time it would be genuine).  If you see something that looks tasty and appealing to your senses, get it.  I'd almost guarantee that it will live up to every fan-tasty filled thought you would have about it.

Plus this bakery is 1/3 of the leg in the Bermseada triangle (get it?  Berm-SEA-da?) of my biggest weak points: gourmet pizza at Serious Pie, crab cakes and cocktails at Dahlia Lounge, and the triple coconut cream pie here.  Oh, Tom.  You complete me.

It's dangerous territory.  You've been warned.  Even so, it's worth the venture.  My significant other drove 4 hours to Seattle to buy me a whole pie for my birthday 2 years ago.  His sacrifice was greatly appreciated, and I did not let one single crumb of that pie go to waste.

Tom does publish his recipe, so if you're not in Seattle and want to give it a go: have fun!  Another food blogger put together a blog when she made Tom's recipe.  I've personally never tried it (though I've threatened to many times), so I really can't help you out if you have issues with it.  It does look a bit complicated.

Mary Cook's Blog - Tom Douglas Triple Coconut Cream Pie

I will say one thing: I see two ways to greatly increase the aesthetics and ease of making this pie.  There is a simple and cheap solution to forming pie crusts available on Amazon.  I seriously don't know how someone didn't come up with this idea years ago!

It's called a Pie Crust Bag.  Basically it's a clear round bag with a zipper along the side.  You just lightly flour it, close the zipper up, shake, toss your ball of crust dough in the center, zip, and roll it out until the dough fills up to the edges.  That's it!  They sell them in 11" and 14" sizes.  I have both, though I've only used the 11" one since I only have 9 inch pie dishes.  I don't know too many people who have 12" pie dishes (aside from Martha Stewart).  So if you're unsure of your pie dish size, go with the 11" one.  I have only found two down sides to these things:

1) Cleanup is kind of a pain since the butter, milk, and shortening in pie crust tend to get caked on the plastic.  Though it is much less of a pain than cleaning up after rolling out a crust the old-fashioned way!
2) Since the zipper doesn't fold on one side of the package, the edge of the crust will have a small line in it.  This isn't really a huge deal if you crimp my pie crust with a fork.

I also recommend getting a silicon pie crust shield to keep it from burning the edge of the crust.  The one I bought from Amazon worked really, really well.

Of course every pie-maker needs pie beads.  Sure, you can use pinto beans to hold down your pie.  Though really, if you're going to make lots of pies, just get the beads!  I put down a round circle of either parchment paper or aluminum foil on the bottom of the pie crust before putting the beads down.  I prefer using aluminum foil because I can press it on the bottom of the pie pan and form a nice round shape.  I then cut the foil around that circle, and voila!  When I'm done, I run the beads through a metal colander to cool them off before I put them back in a bag. 

I even included a handy little link for finding these items below. They're very affordable. If you mouse over the links, I included some helpful comments for each item. Enjoy!

Sunday, May 27, 2012

Seattle Foodie 100

A few years ago, Seattle Yelpers got together and created a list of the top 100 dishes in Seattle.

There are a few variations of this list out there.  The most accurate list is here:
http://apps.facebook.com/seattleonehundred/

Another food blogger created a page with pictures of some of these foods.  Though whoever created *this* list has made some changes to it.  For example, they removed Salumi's from the list!  This is completely, and totally unacceptable!  So really, this page is only good for the pictures.
http://www.foodspotting.com/guides/84-the-seattle-100/memberships/716

About a year and a half after starting on this list, we are over 75% through the list.  That's right, we've had over 75 of the "best" dishes in Seattle in a year and a half.  Most of what is left are beverages and things we aren't really into.  But we are bound and determined to finish this list!

For anyone who is looking to take on this challenge, I have a few warnings for you:

1) This will not be cheap.  Plenty of the dishes are very affordable and easily accessible, but finishing the list will not be cheap.
2) It will not be easy to finish this list, period.  So many of the places have limited hours, date/time restrictions on the food items, cash only accepted, etc.
3) I have to say that only about 2/3 of the list is legitimately tasty.  Sure, a lot of this is a matter of personal taste.  Regardless, I have no earthly clue as to why about 1/3 of these items are even on here.  I would like to demand a recount on several items!

I have posted a lot of my thoughts on this list through my Yelp account.  I plan on posting some more details on these adventures here on this blog.

So keep your eyes and salivary glands open for more info to come!

Friday, March 23, 2012

My favorite Seattle sandwiches - Salumi's!

About a decade ago, I almost never ate sandwiches.  I had that stereotypical 5 year old's taste in sandwiches: bread (preferably wheat), mustard, meat (preferably ham).  The end.  I know, this is pathetic.  The good news is I can't even recall the last time I ate a sandwich like that.  I am a changed woman!

Since moving to Seattle, I lost access to some of my favorite sandwich places like Jason's Deli.  Get the turkey muffaletta half sandwich.  It's nomful.  Since I can't get that sandwich up here, I had to start trying out some other places.  Here is one of my favorites:

Salumi's Artisan Cured Meats
located in Pioneer Square
309 3rd Avenue South Seattle, WA 98104
(206) 621-8772


This place is to die for!  Salumi is the Italian word for salami, so as you can probably guess, they sell their own cured meats.  Mario Batali's father is the owner.  He worked for Boeing for 30 years.  After retiring, he went to Italy to learn to cure meats.  When he came back, he created Salumi's.  This is one of my absolute favorite places in all of Seattle!  My "dude" is the Yelp check-in duke at Salumi's.  He is the person who showed me this place.  I am so glad he did!

You do need to know a few things about this restaurant before coming in.  They are only open Tuesday-Friday, 11 am - 4 pm.  That's it.  They don't need to be open on the weekends.  There is a line out the door every single day, and they sell out of stuff FAST!  I have an insider's tip that I won't share publicly, but you'll have to reach out to me personally if you want to hear it.  To find the place, just look for the line of people and the orange penant flag with the picture of the pig on it.  They do accept credit cards, and they only have street parking available.  They do host private parties, though I've never done one myself.  I am very tempted to do so one of these days. 

If you are never able to make it here during their operating hours, fear not!  You can find some of their sliced salami at Metropolitan Market near the deli section.  Delaurenti's in Pike Place also sells some of their salamis.  Also, several restaurants in the Seattle area use their cured meats in their dishes.  One of my personal fav's is Pagliacci Pizza.  They serve Salumi's spicy pepperoni.  I always order their grand salami primo, and I have them substitute the regular pepperoni for Salumi's pepperoni.  I also add onions to it.  It is a superb pizza!  They used to sell Salumi's San Marino salami on their pizzas, but they are no longer able to obtain enough salami for their demand.

Usually, every Tuesday is gnocchi day, and they fly one of their aunts in to make it.  It is definitely worth the trip on a Tuesday.  It's best to call a few days in advance to find out when they will have it next, because sometimes she can't make it.  They vary the sauces with each day's serving of gnocchi, so you could order it every time and not grow tired of it.  They only have a few tables with about a total of 20 seats in the restaurant, and they will not serve the gnocchi to go.  If you don't eat the gnocchi fresh, it will just congeal and stick together.  I truly appreciate their dedication to quality food, though some days I wish I could take my chances and take my order to go!  Otherwise you're just going to have to sit at a table for 10 and get used to the fact that you will be sitting at a table with other patrons.  Don't worry, you already have one wonderful thing in common with them, so conversation topics will be easy to find.

Every day they vary their specialty items on the menu (soup, pasta, veggies, sandwich of the day), but almost every time, I get the muffo sandwich.  It's become a comfort food for me.  It has a wonderful olive tapenade, genoa salami, regular salami, provolone cheese, and it's served on a type of ciabatta bread.  They have their bread delivered fresh every morning.  They only offer their sandwiches on 2 types of bread - sticcole and giuseppe.  If you like olives - even just a little bit - you will LOVE this sandwich.  I would probably request it as part of my "last meal"!

A few times I've visited, I've seen people in line wondering what they are going to pick.  They look so puzzled and anxious.  It's like they're on the game show "Let's Make a Deal" and they don't know if they should keep the $500 in their hand, or if they should go with what's behind door #1, door #2, or door #3.  The thing with Salumi's is: pick anything.  You'll win.  There are no zonks at Salumi's.  Or you could just get the muffo and you'll be safe.

They also sell their salumi chubs and small bags of sliced salami to go.  Additionally, they sell pancetta, coppa, culatello, prosciutto, lomo, and guanciale to take home.  Sure, it's not quite the same as having a sandwich ready to go.  If you want to bring a treat back home to family on the other side of the planet, there you go.  Make sure you ask them for tips on storing the cured meats.  They won't last forever, but they will last a little longer if they're still in "solid" form (vs. sliced).  They do ship, so that's an added bonus!

You can also visit their website to find about more information:
http://www.salumicuredmeats.com/

Last, but most definitely not least, I found this little gem.  I was doing research for this blog post, and I found this recipe (link below) as a tribute for the Batali's family beloved Aunt Izzy.  She passed away in 2008, and she used to make their gnocchi.  Though I never had the opportunity to meet her, I sure wish I could have met such a woman who could make gnocchi like nobody's business!  Her years of experience may not be easy to mimick, but it's definitely worth trying.  I personally haven't tried it, but I will come back and provide an update when I have the time.

Enjoy!
http://chowhound.chow.com/topics/549147